Allow users authenticated with Microsoft Azure Active Directory to view your private status page
Step 1
Navigate to the Azure Active Directory Dashboard
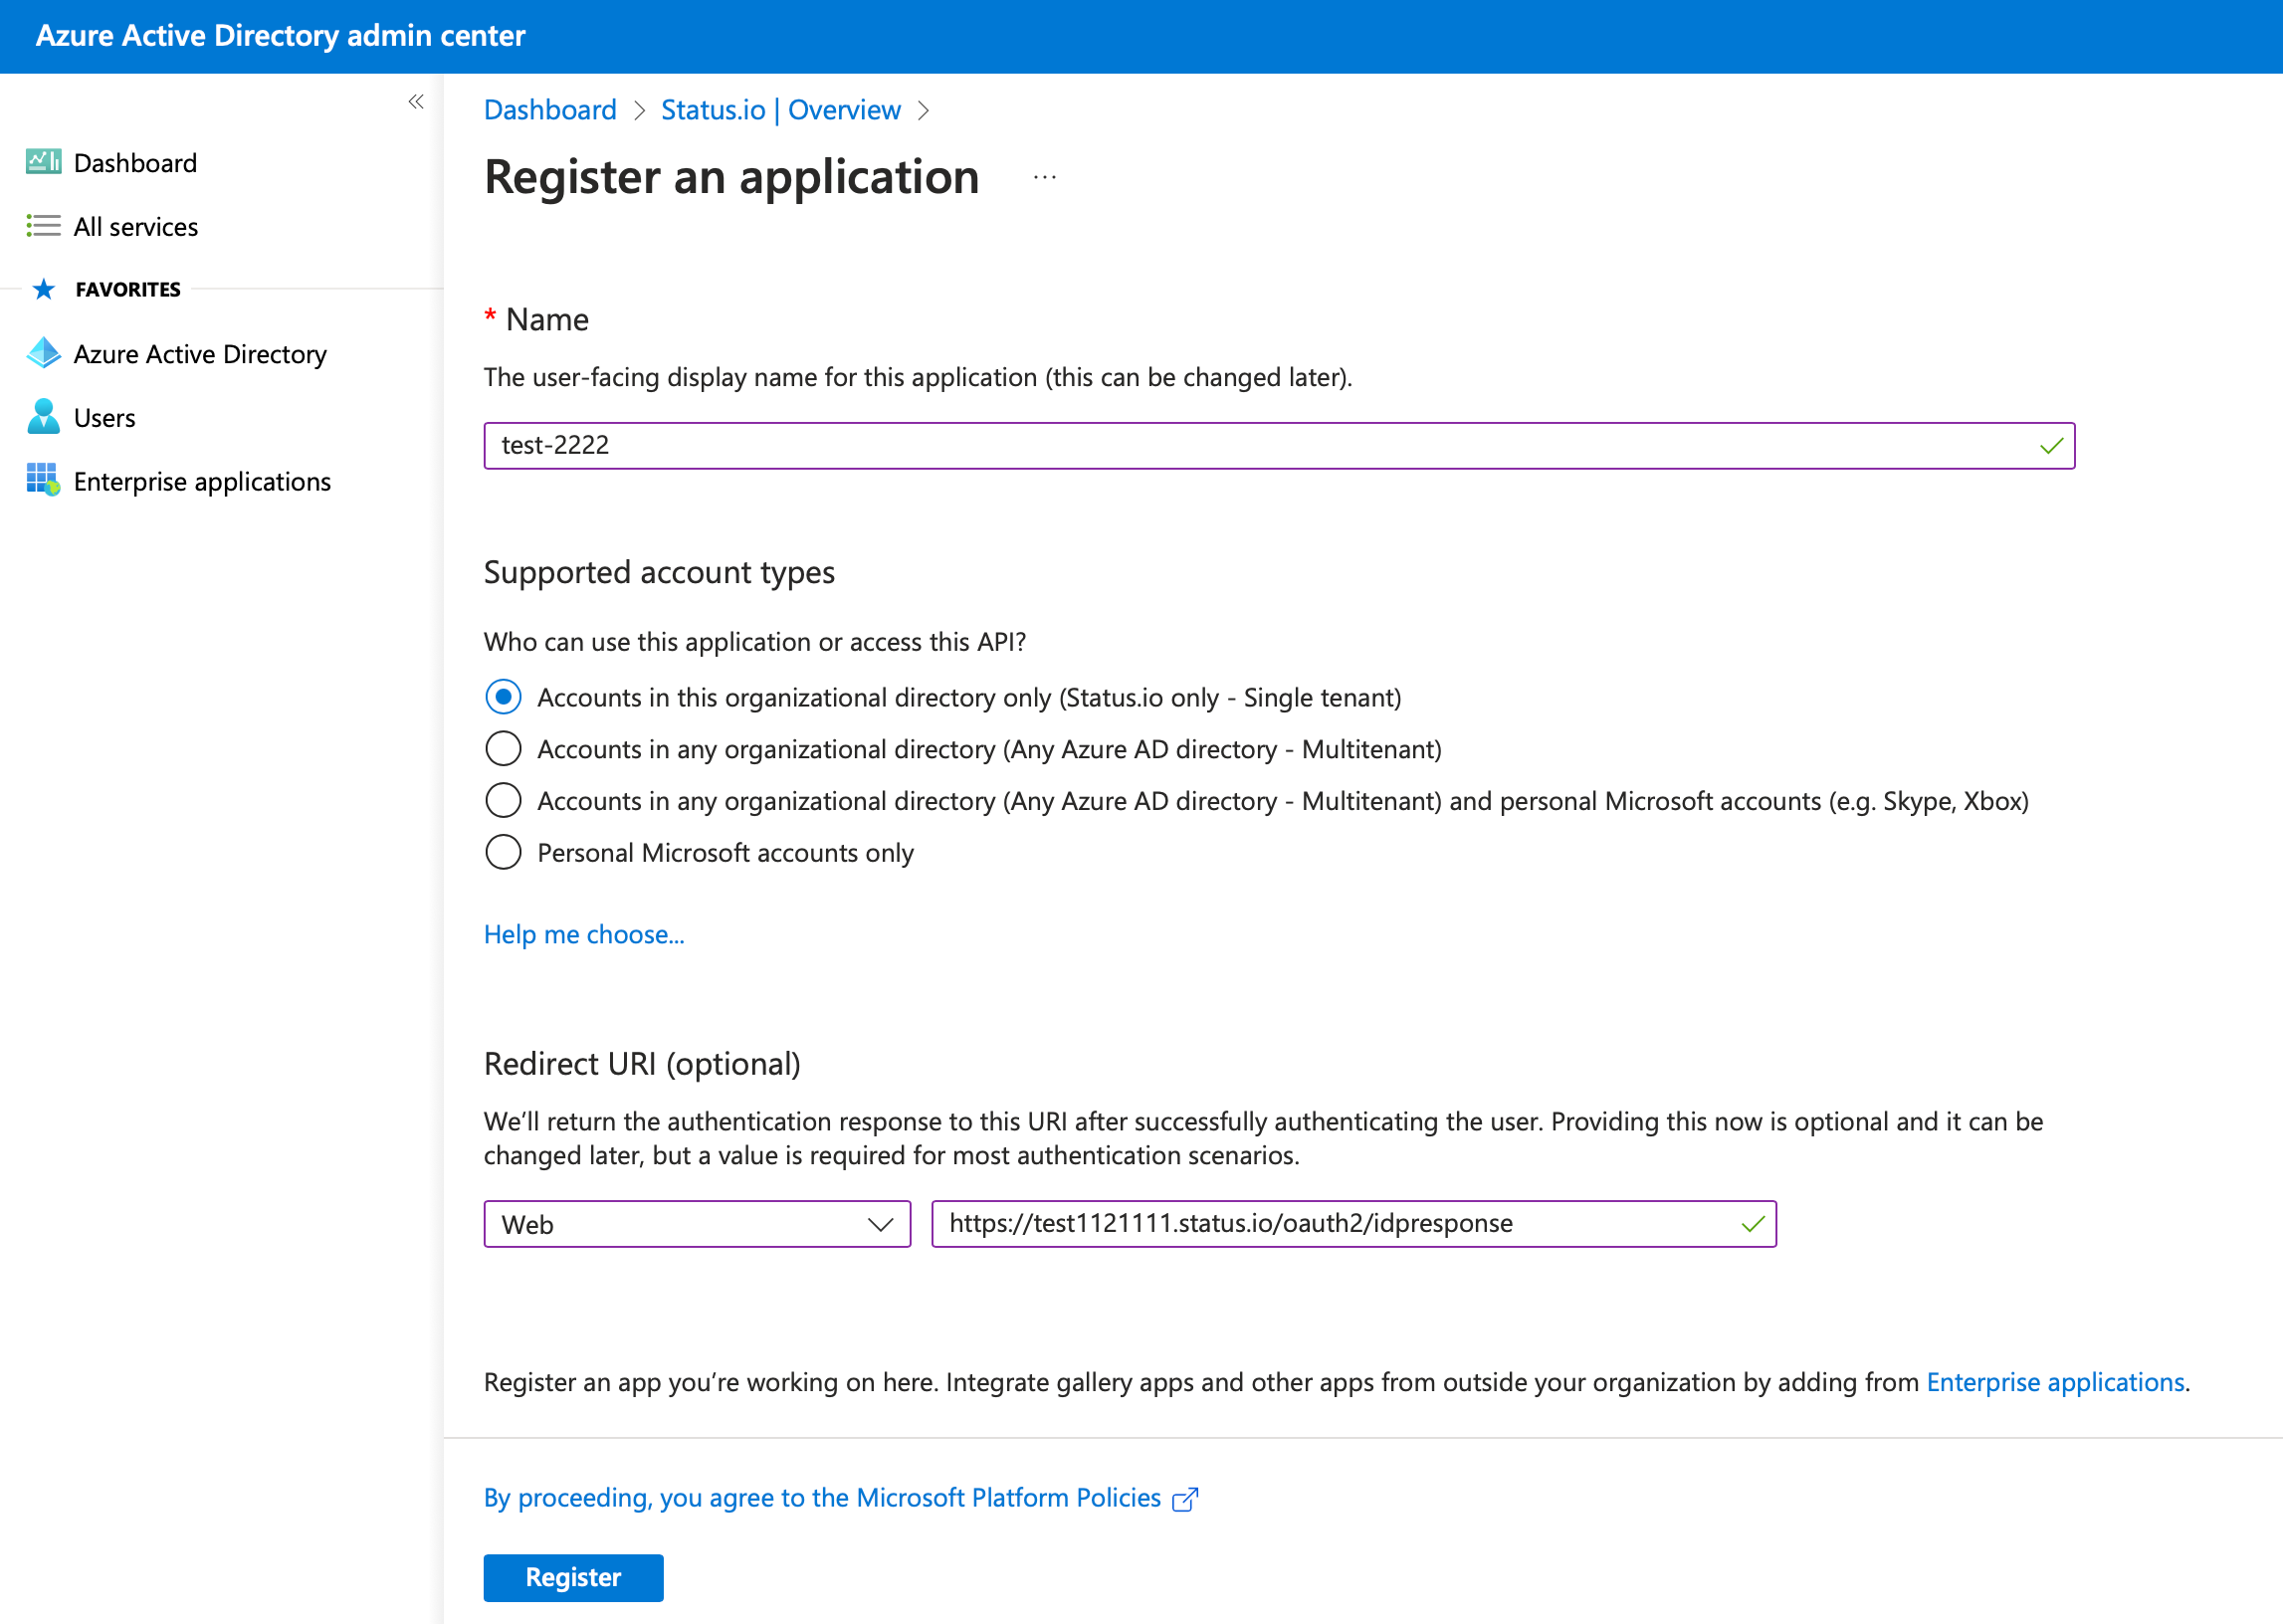
Click + Add and select App registration
Give the application a name
Choose type Web for Redirect URI
Enter the Redirect URI (Copy the Callback URL from your Status.io account)
Step 2
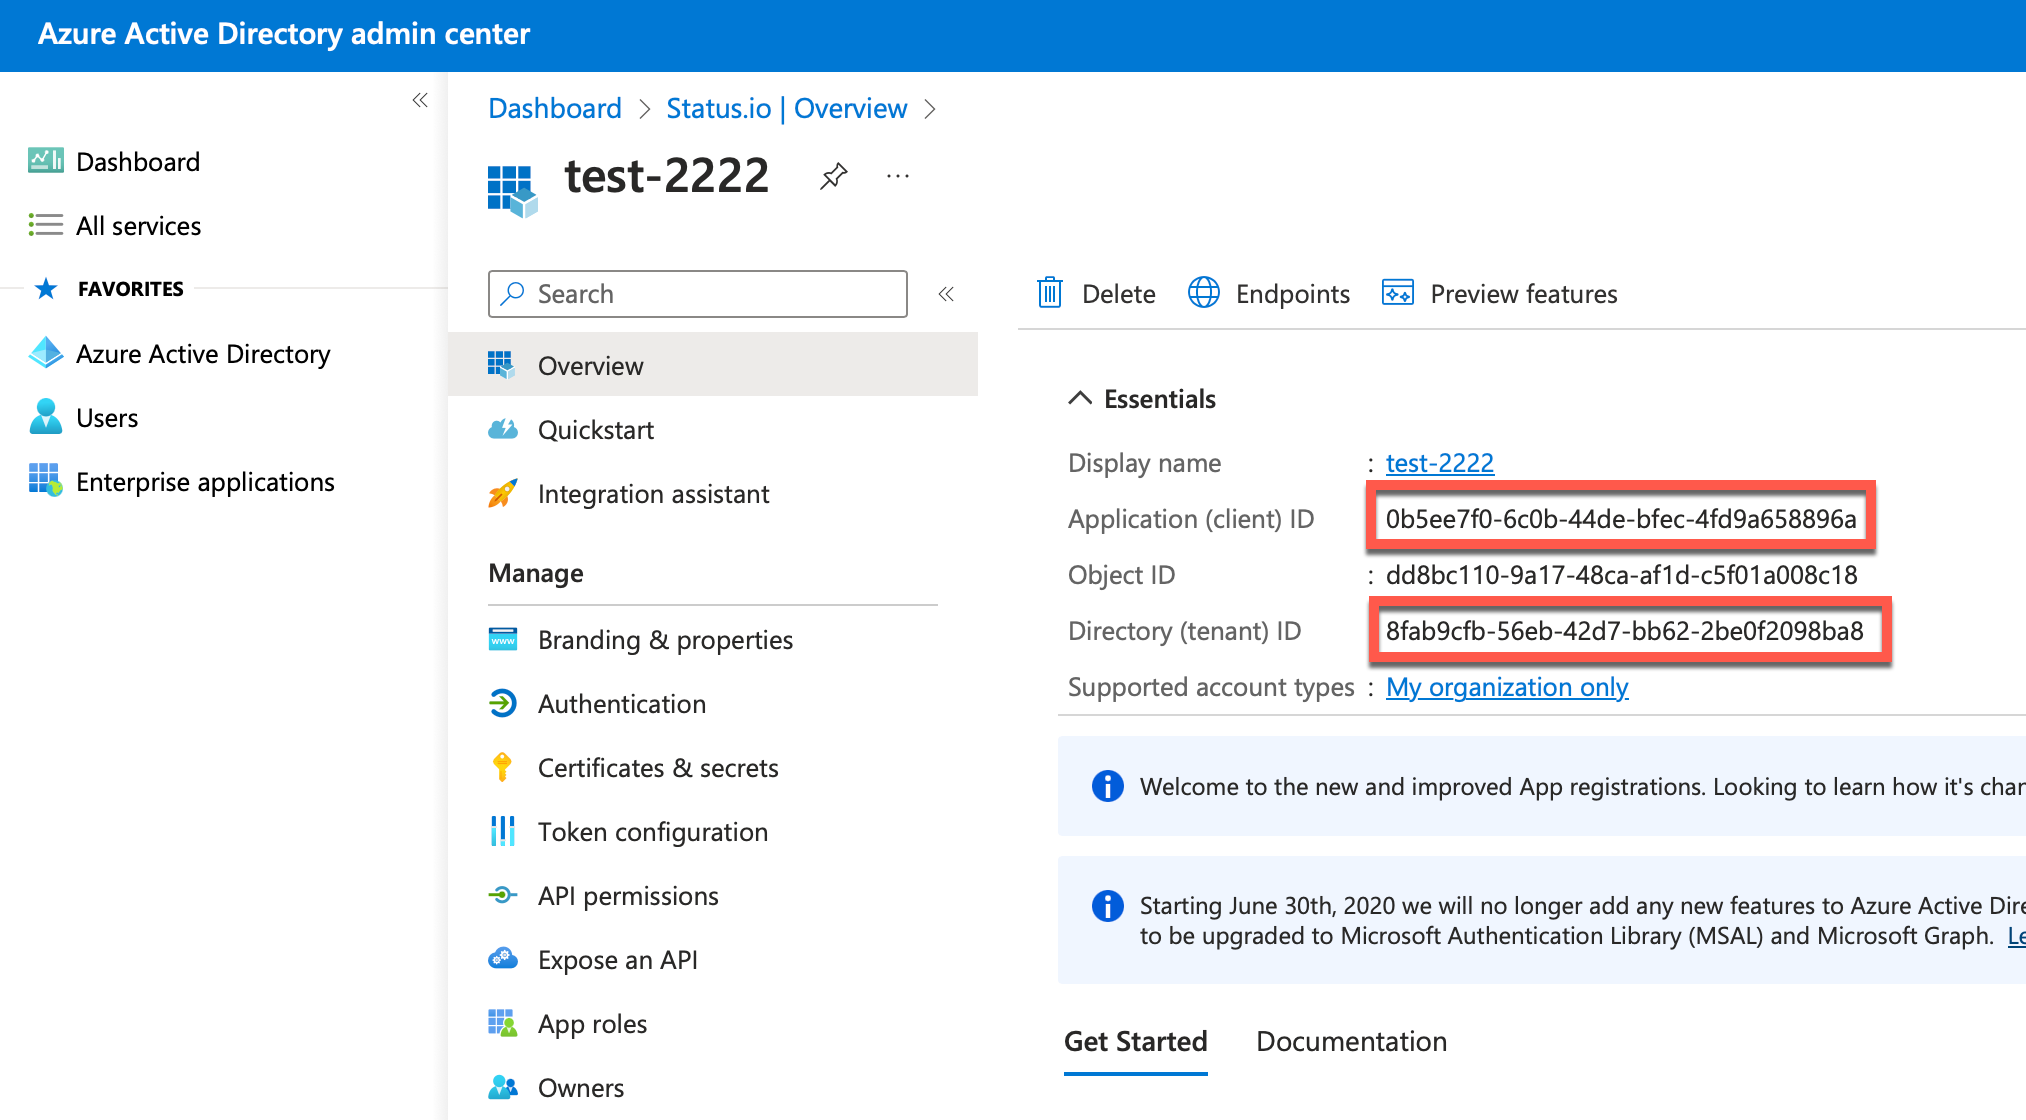
Copy the Tenant ID and Client ID
Step 3
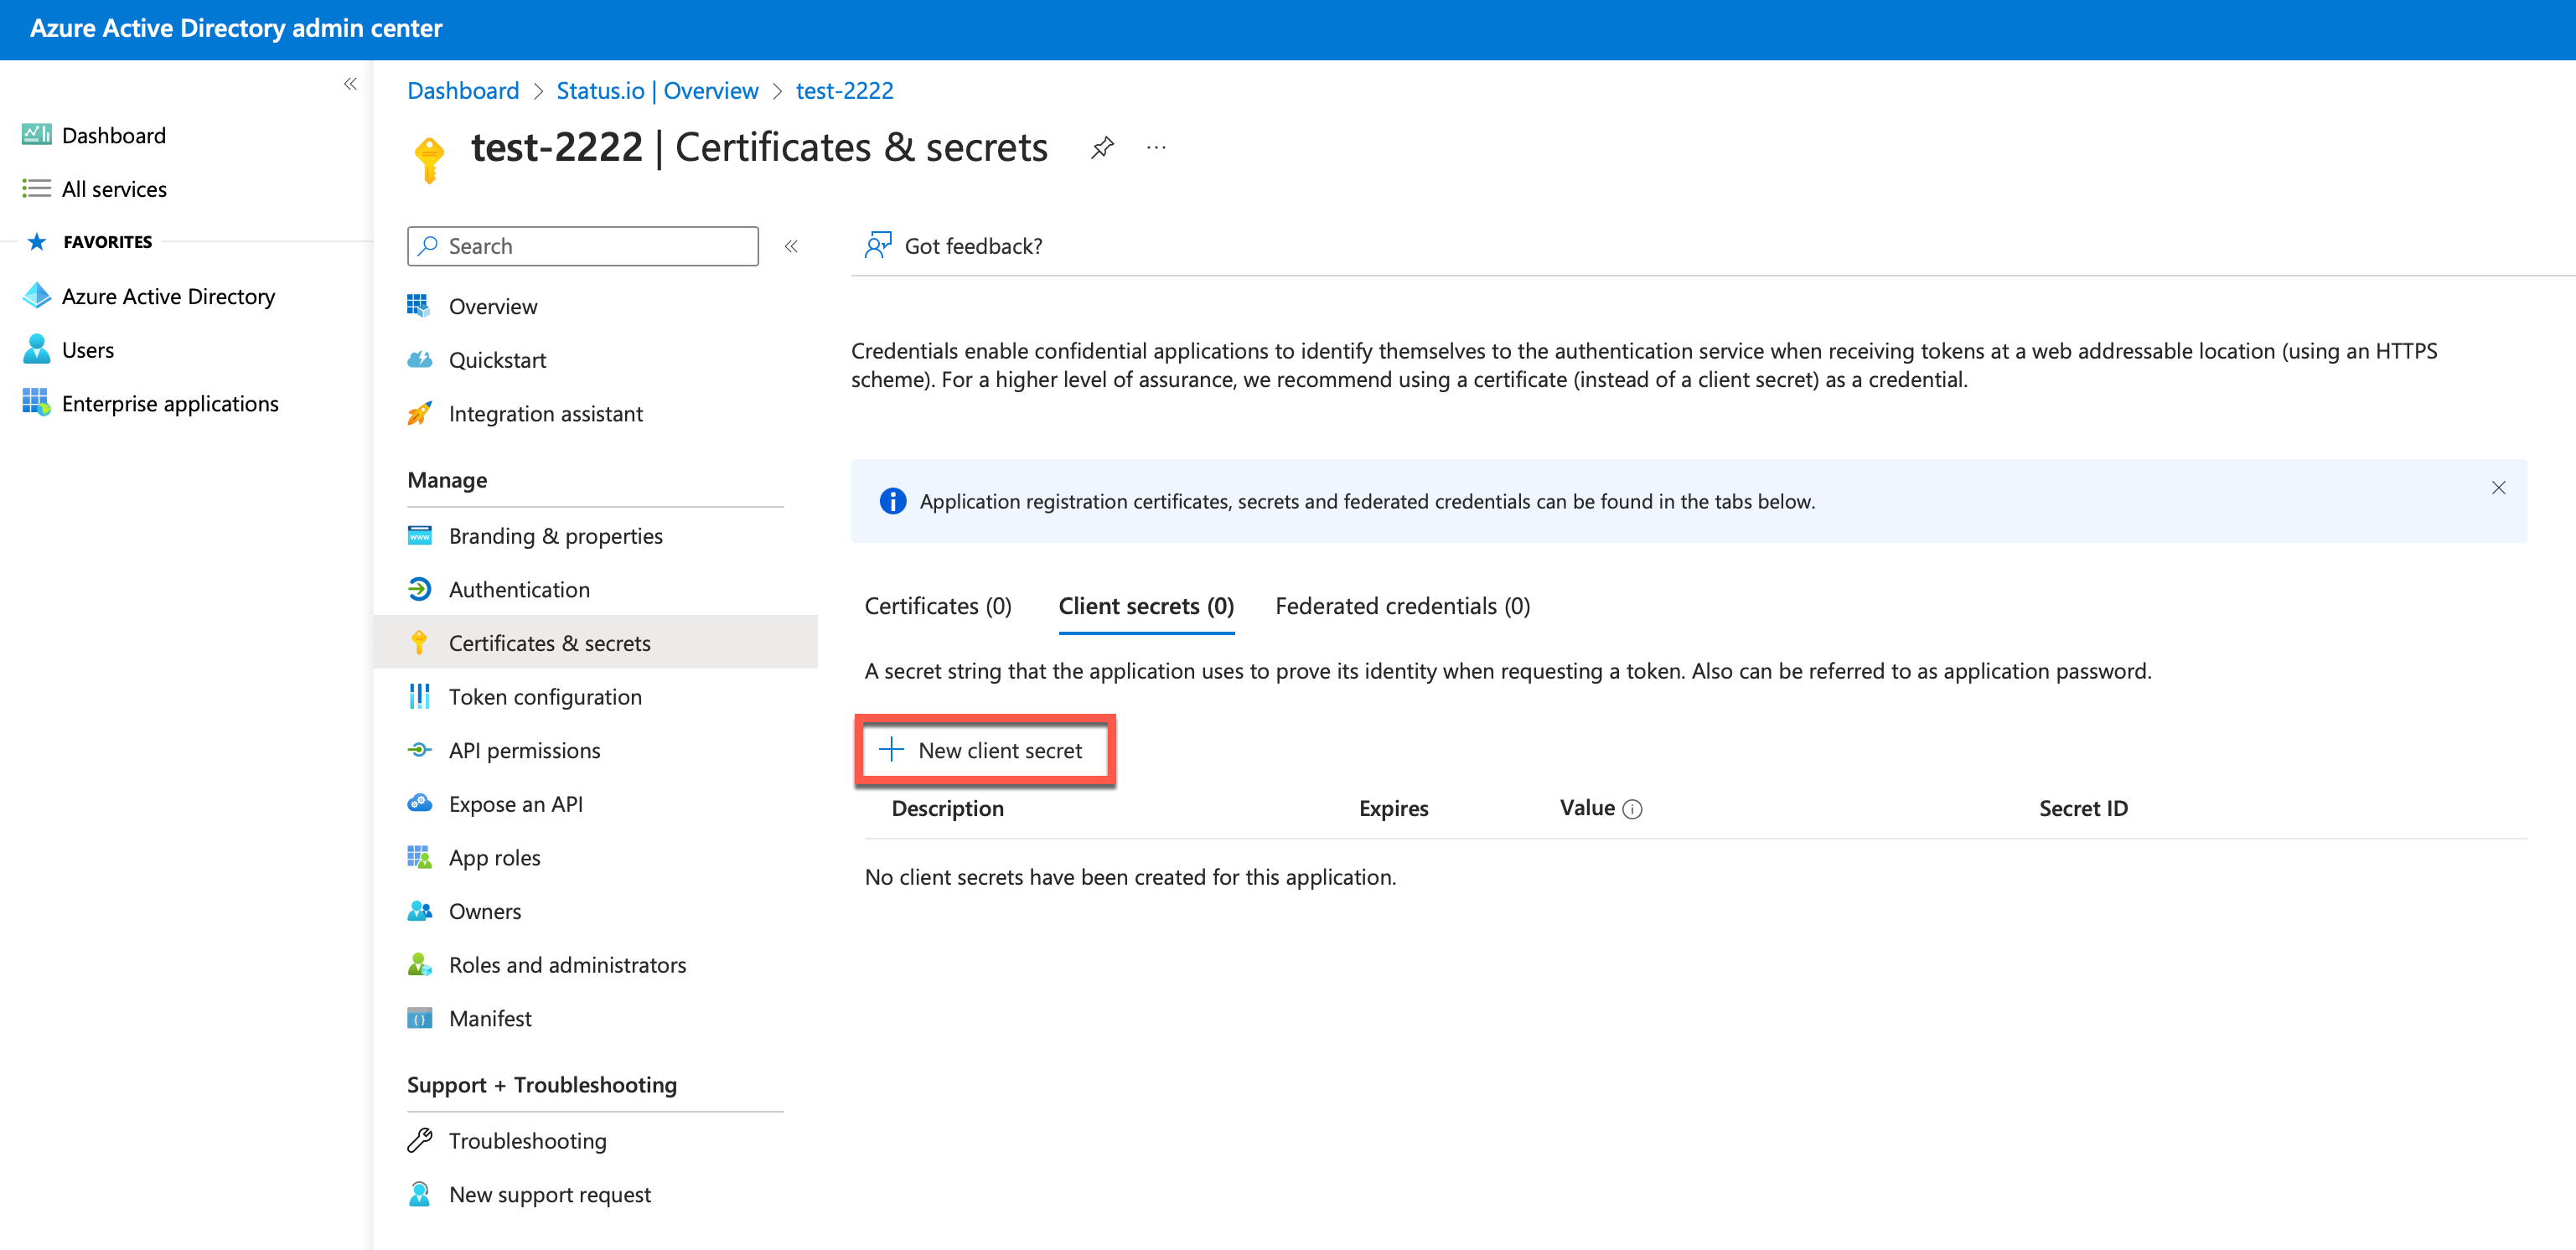
Click Certificates & secrets
Click + New client secret
Enter a description and choose the expiration (Note: We recommend using a date far in the future since the integration must be reconfigured if the client secret expires)
Click Add
Step 4
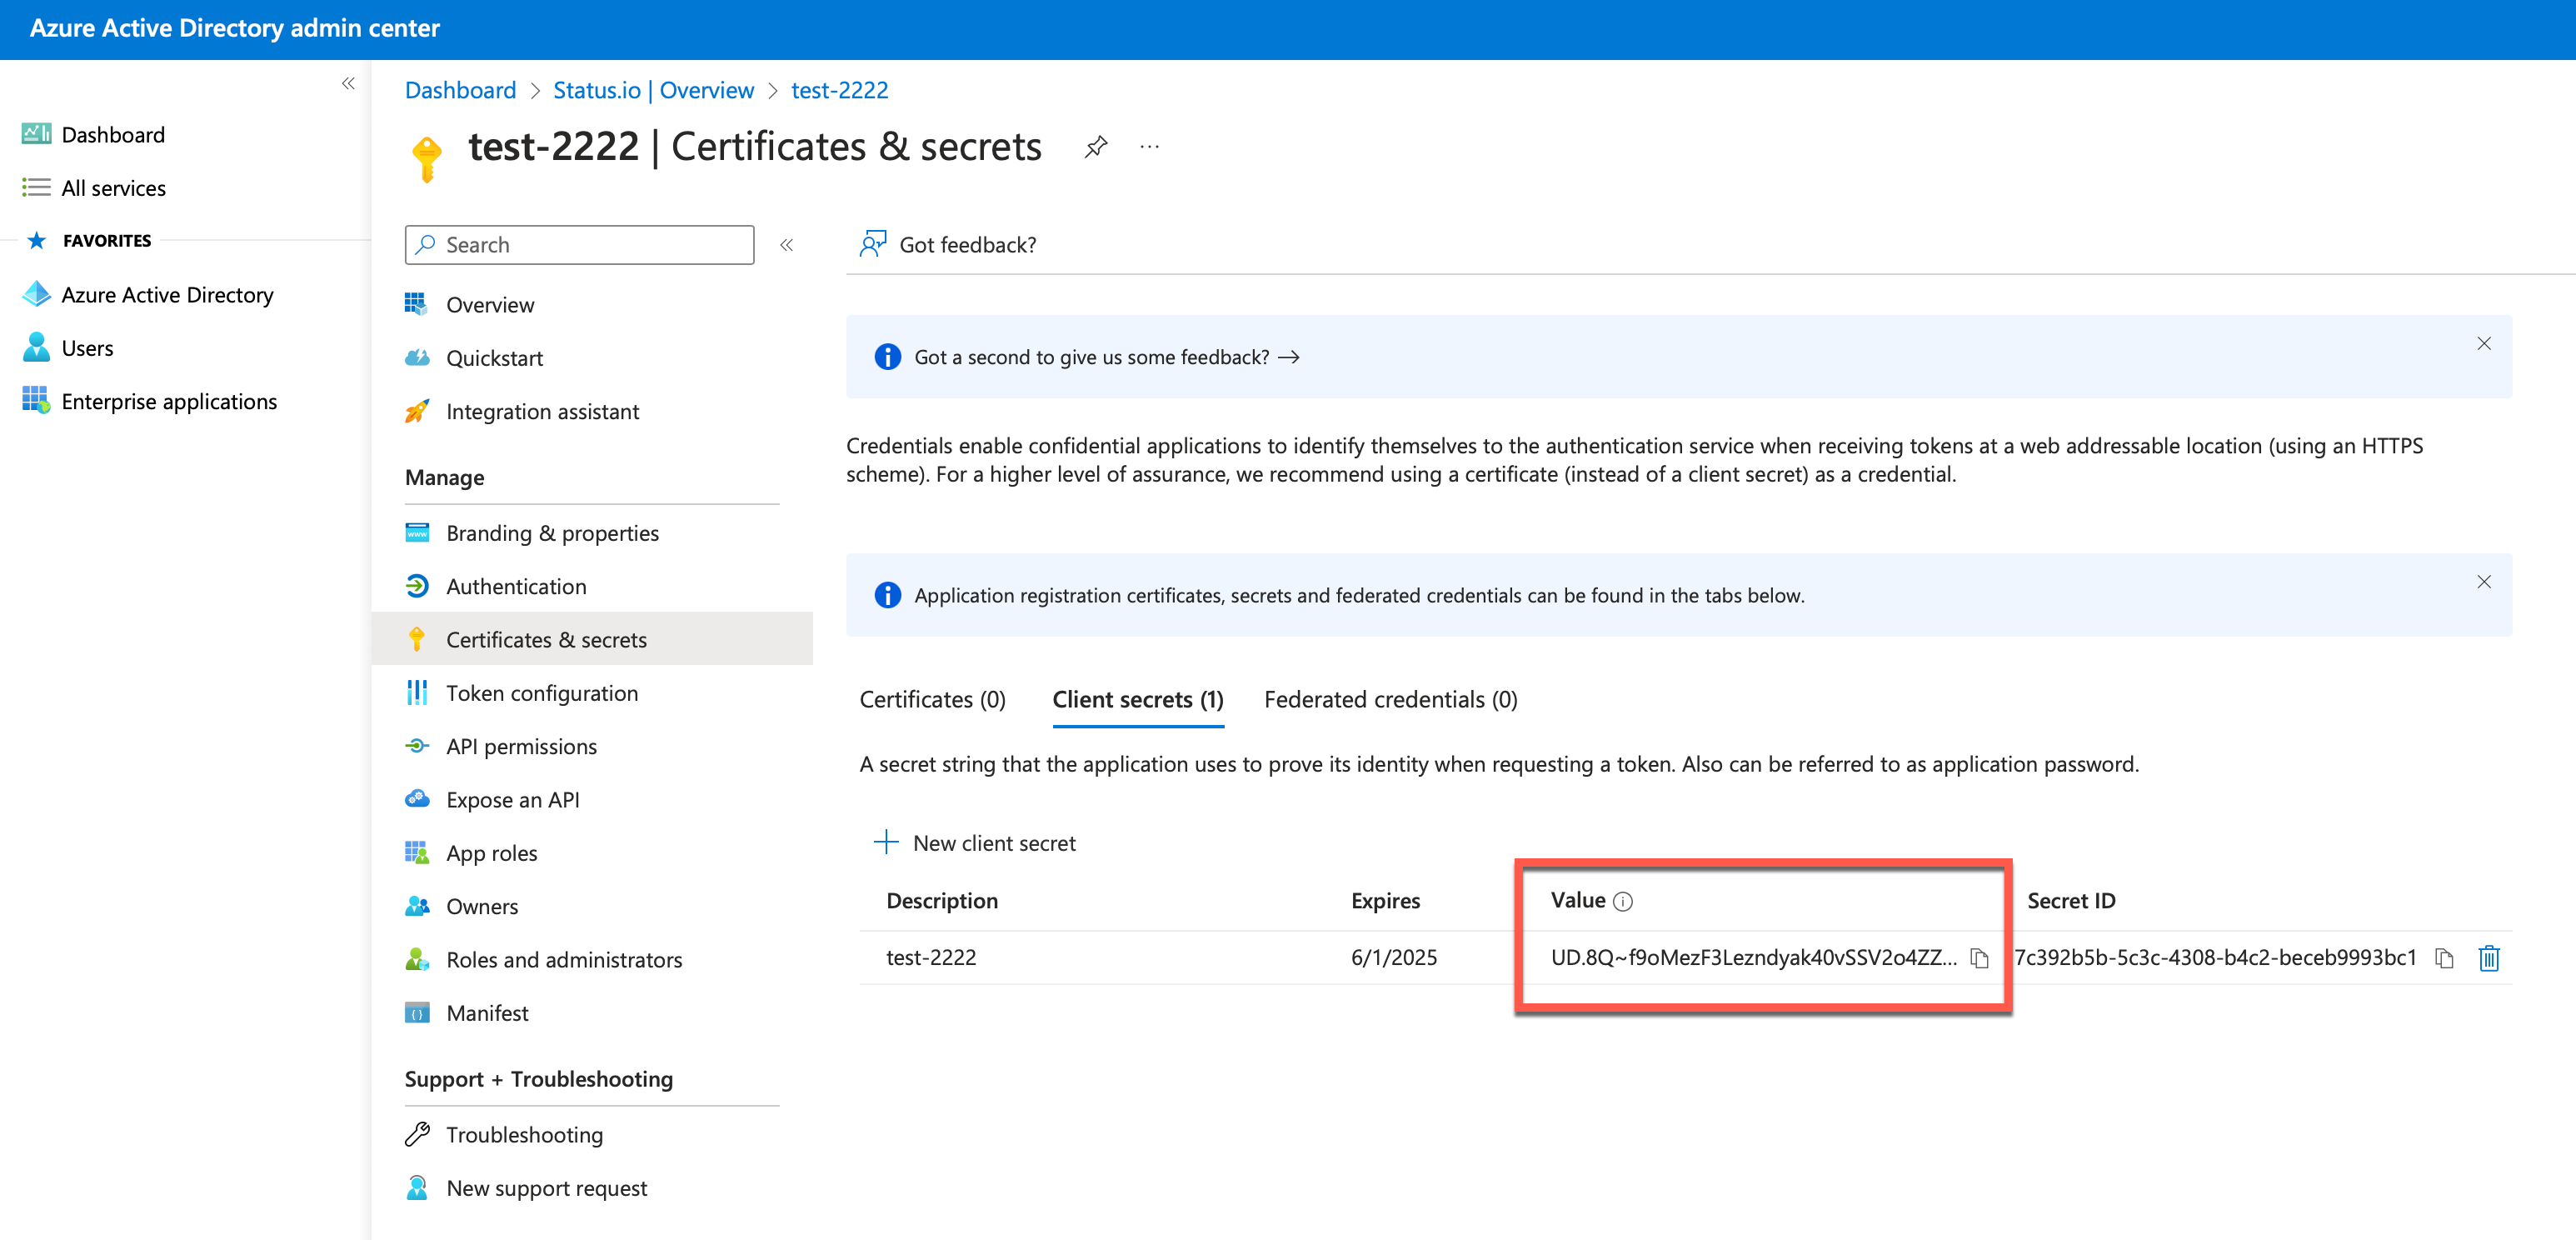
Copy the Secret Value
Step 5
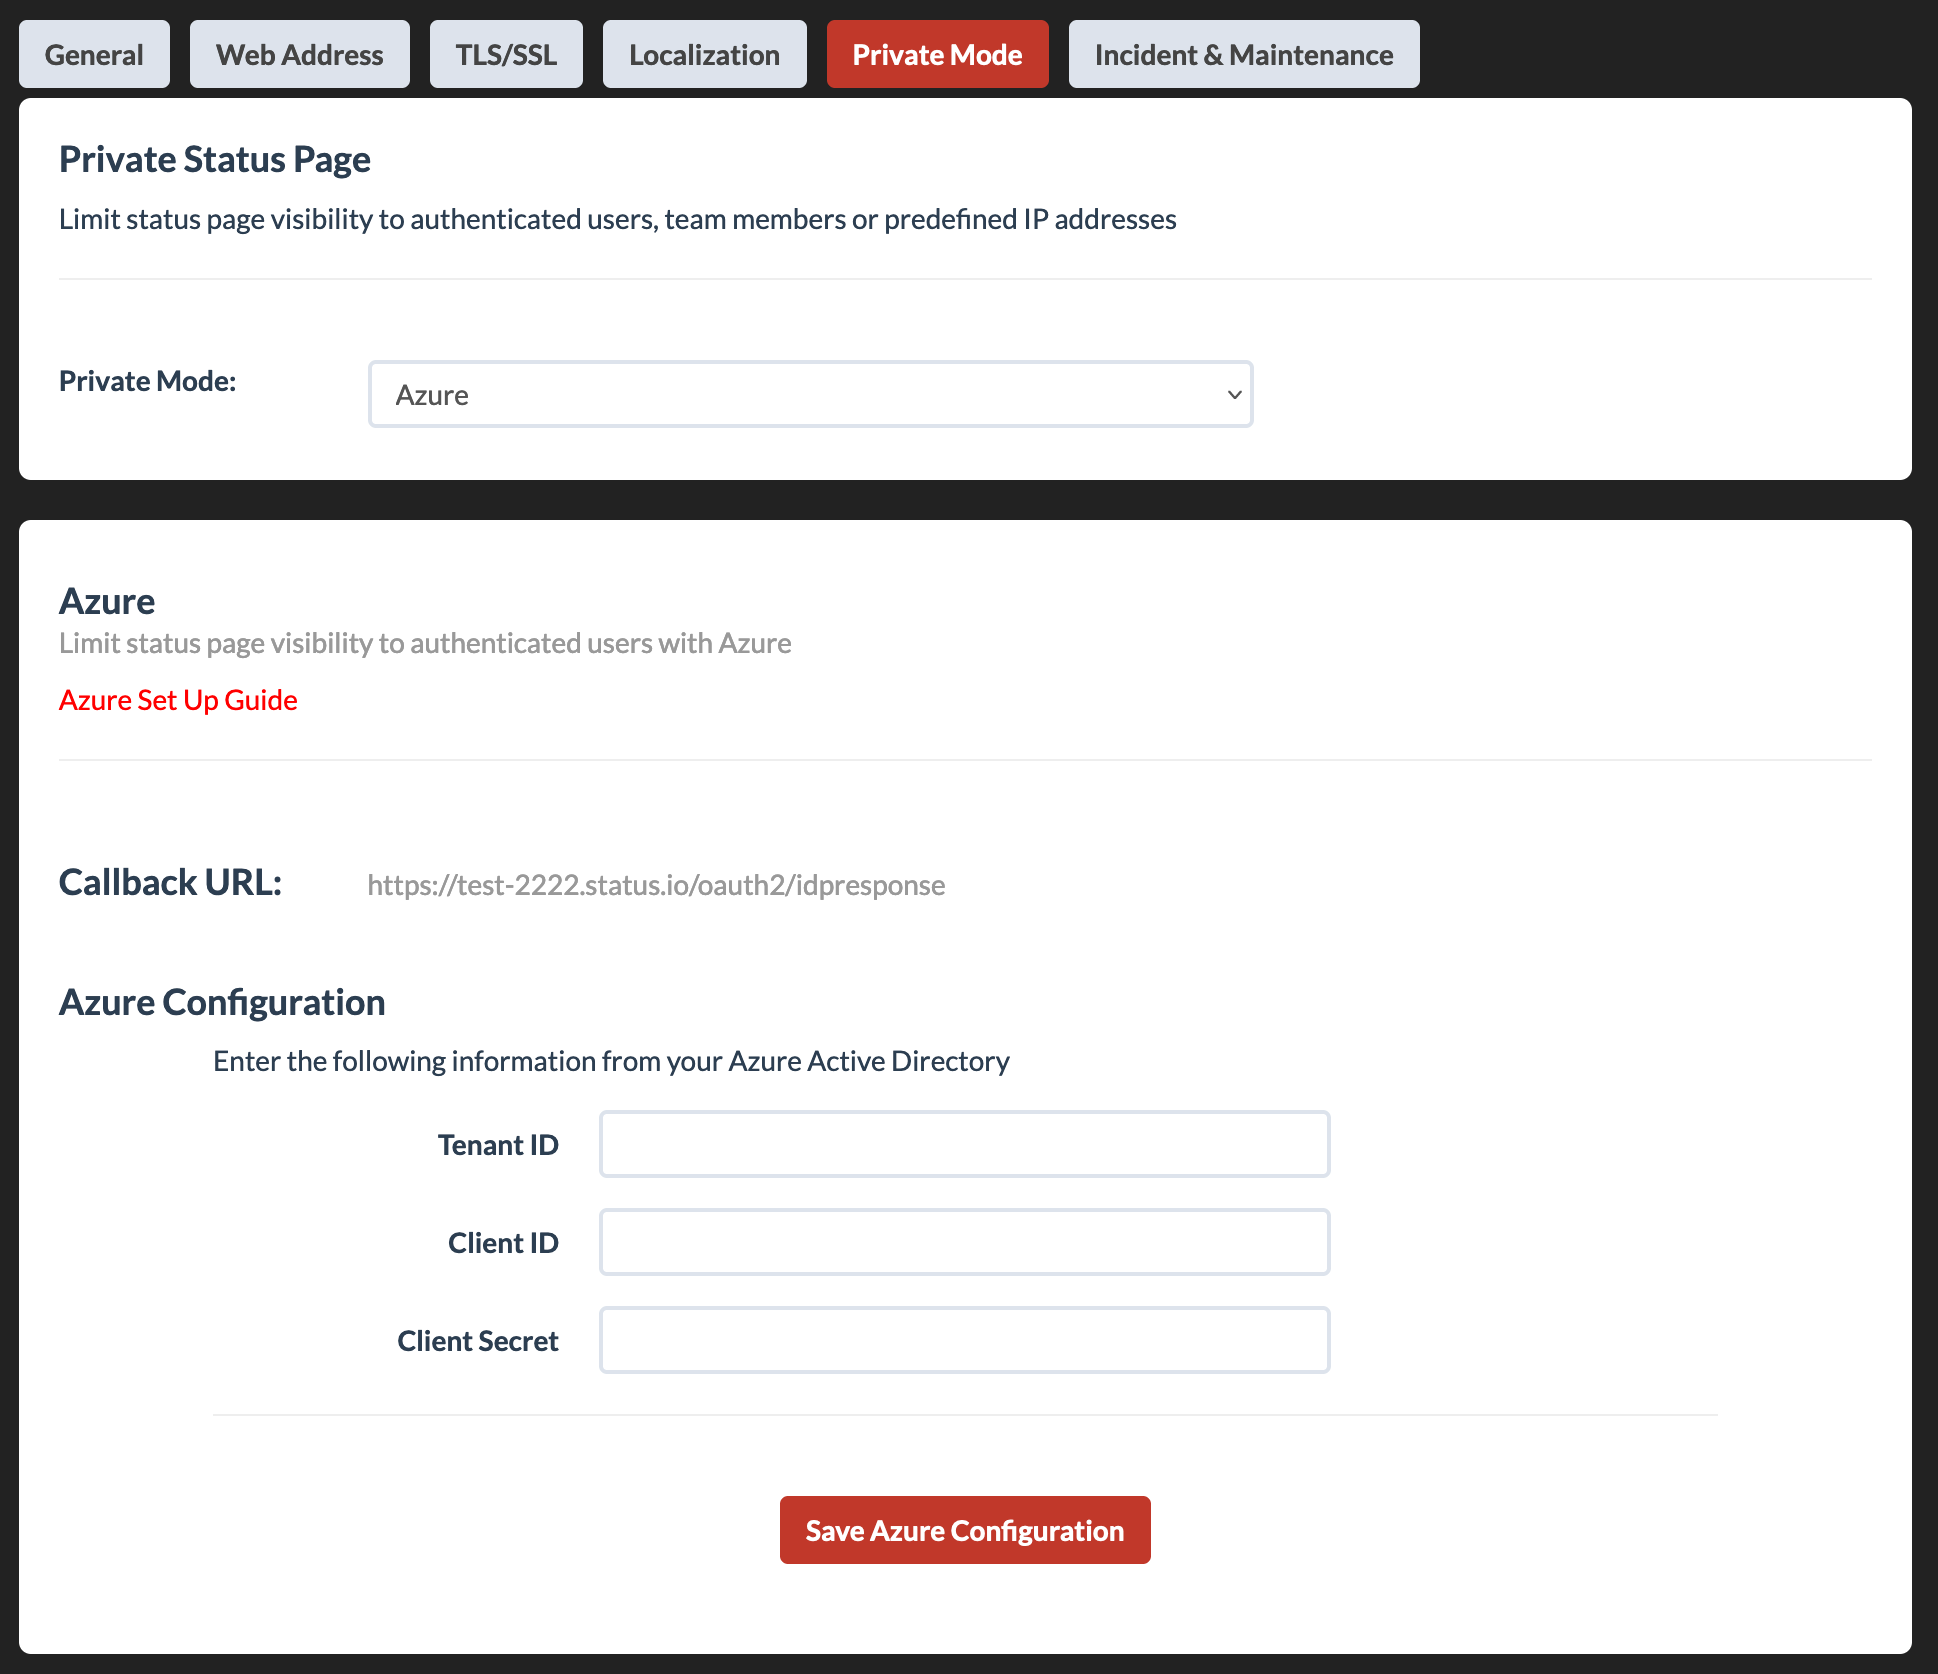
Go to the Private Mode tab in your Status.io account and select Azure
Enter the Tenant ID, Client ID and Client Secret
Click Save Azure Configuration
Update Client Secret
Rotate your client secret without disabling private mode or causing downtime.
Go to the Private Mode tab in your Status.io account and scroll down to the Update Client Secret section.

Troubleshooting
If you’re experiencing issues with your private status page, view Troubleshooting Private Pages for more information.