Allow users authenticated with Google to view your private status page
Step 1
Sign in to your Google account
Go to the Credentials Page in the Google API Console
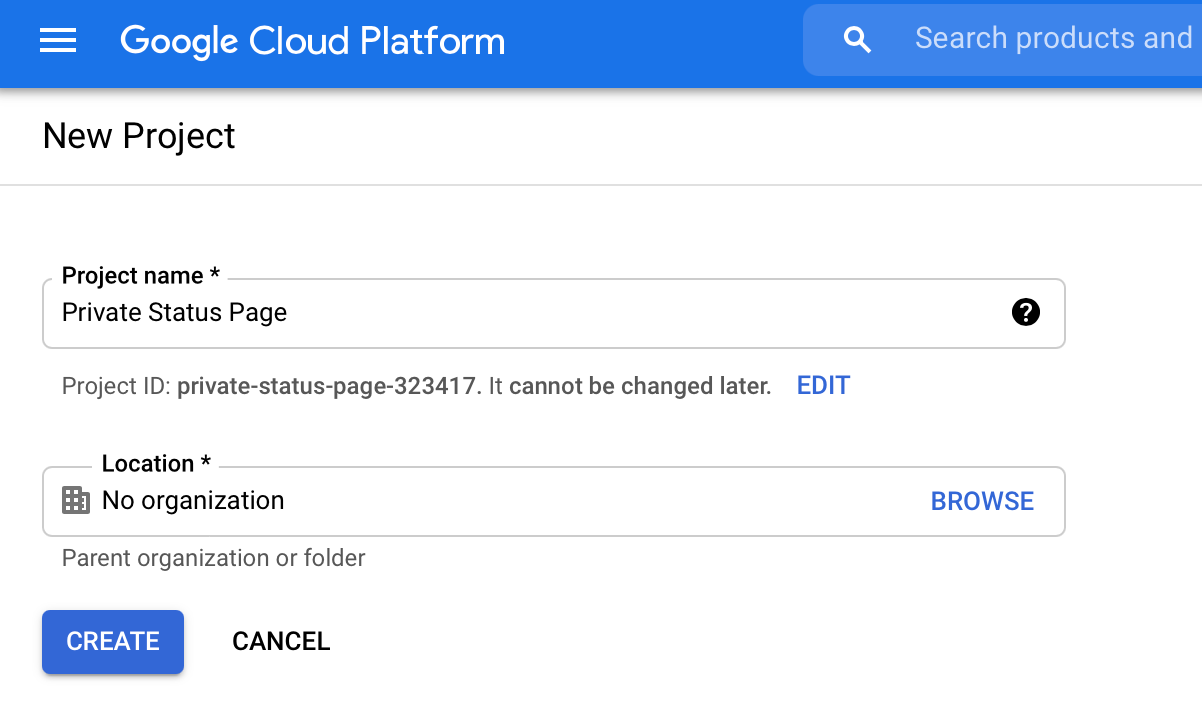
Create a new project
Give the new project a name
Click Create
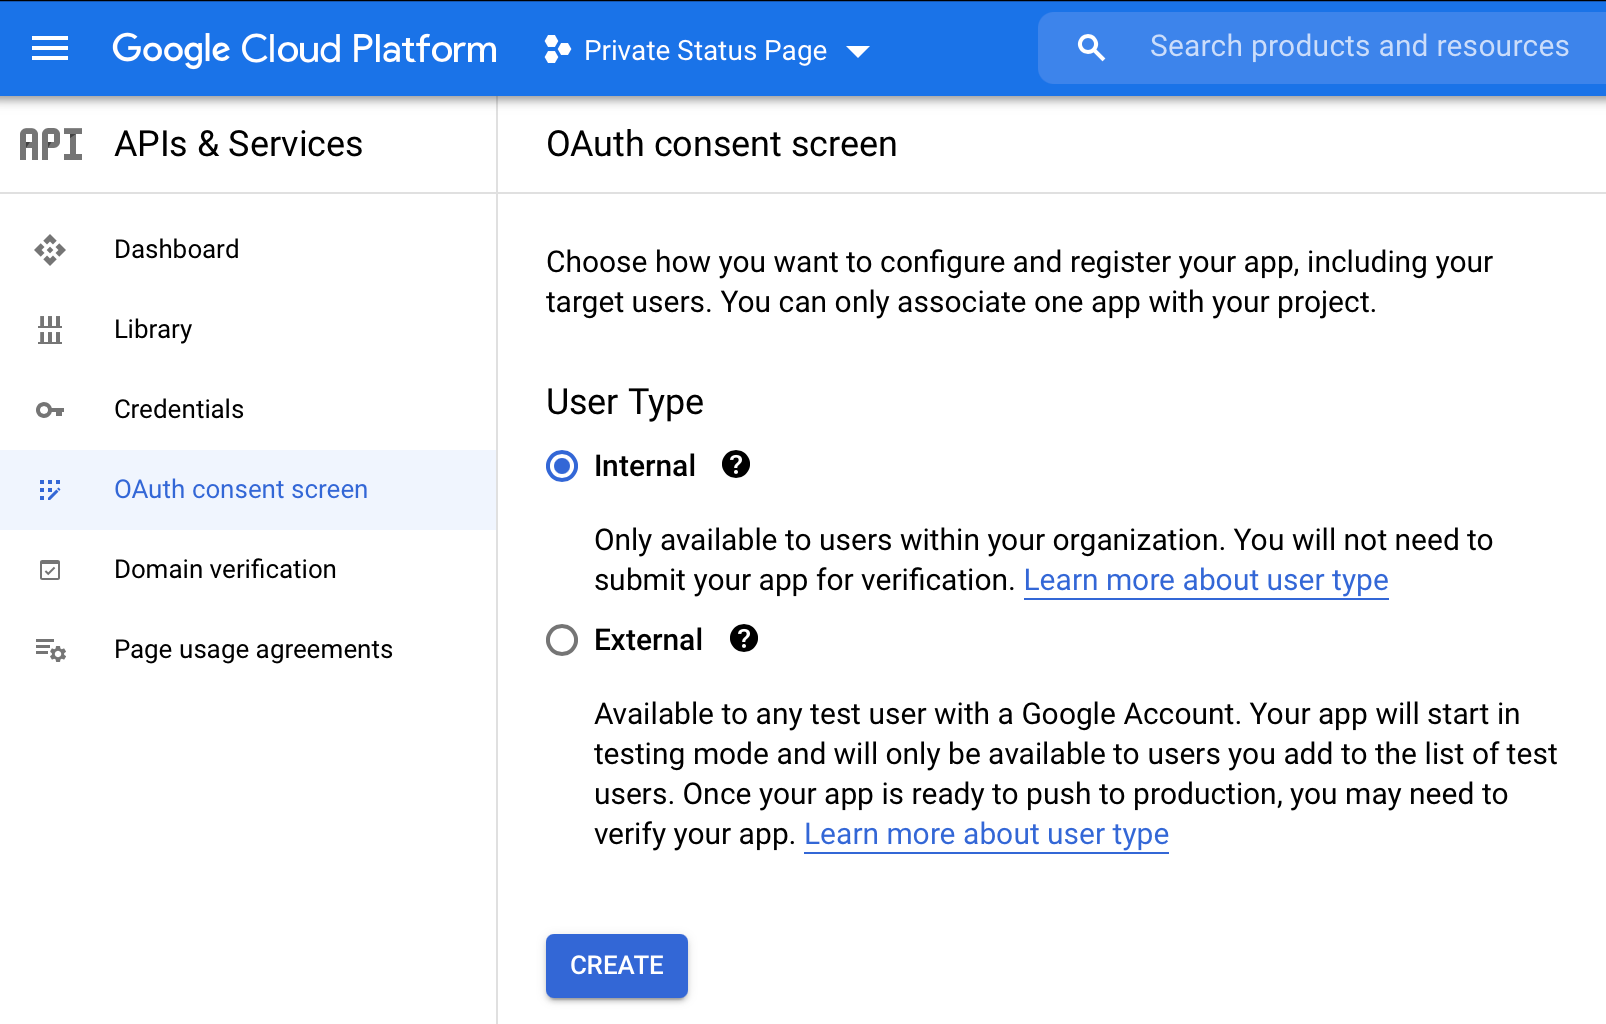
Step 2
Click the OAuth consent screen tab
Choose User Type Internal
Click Create
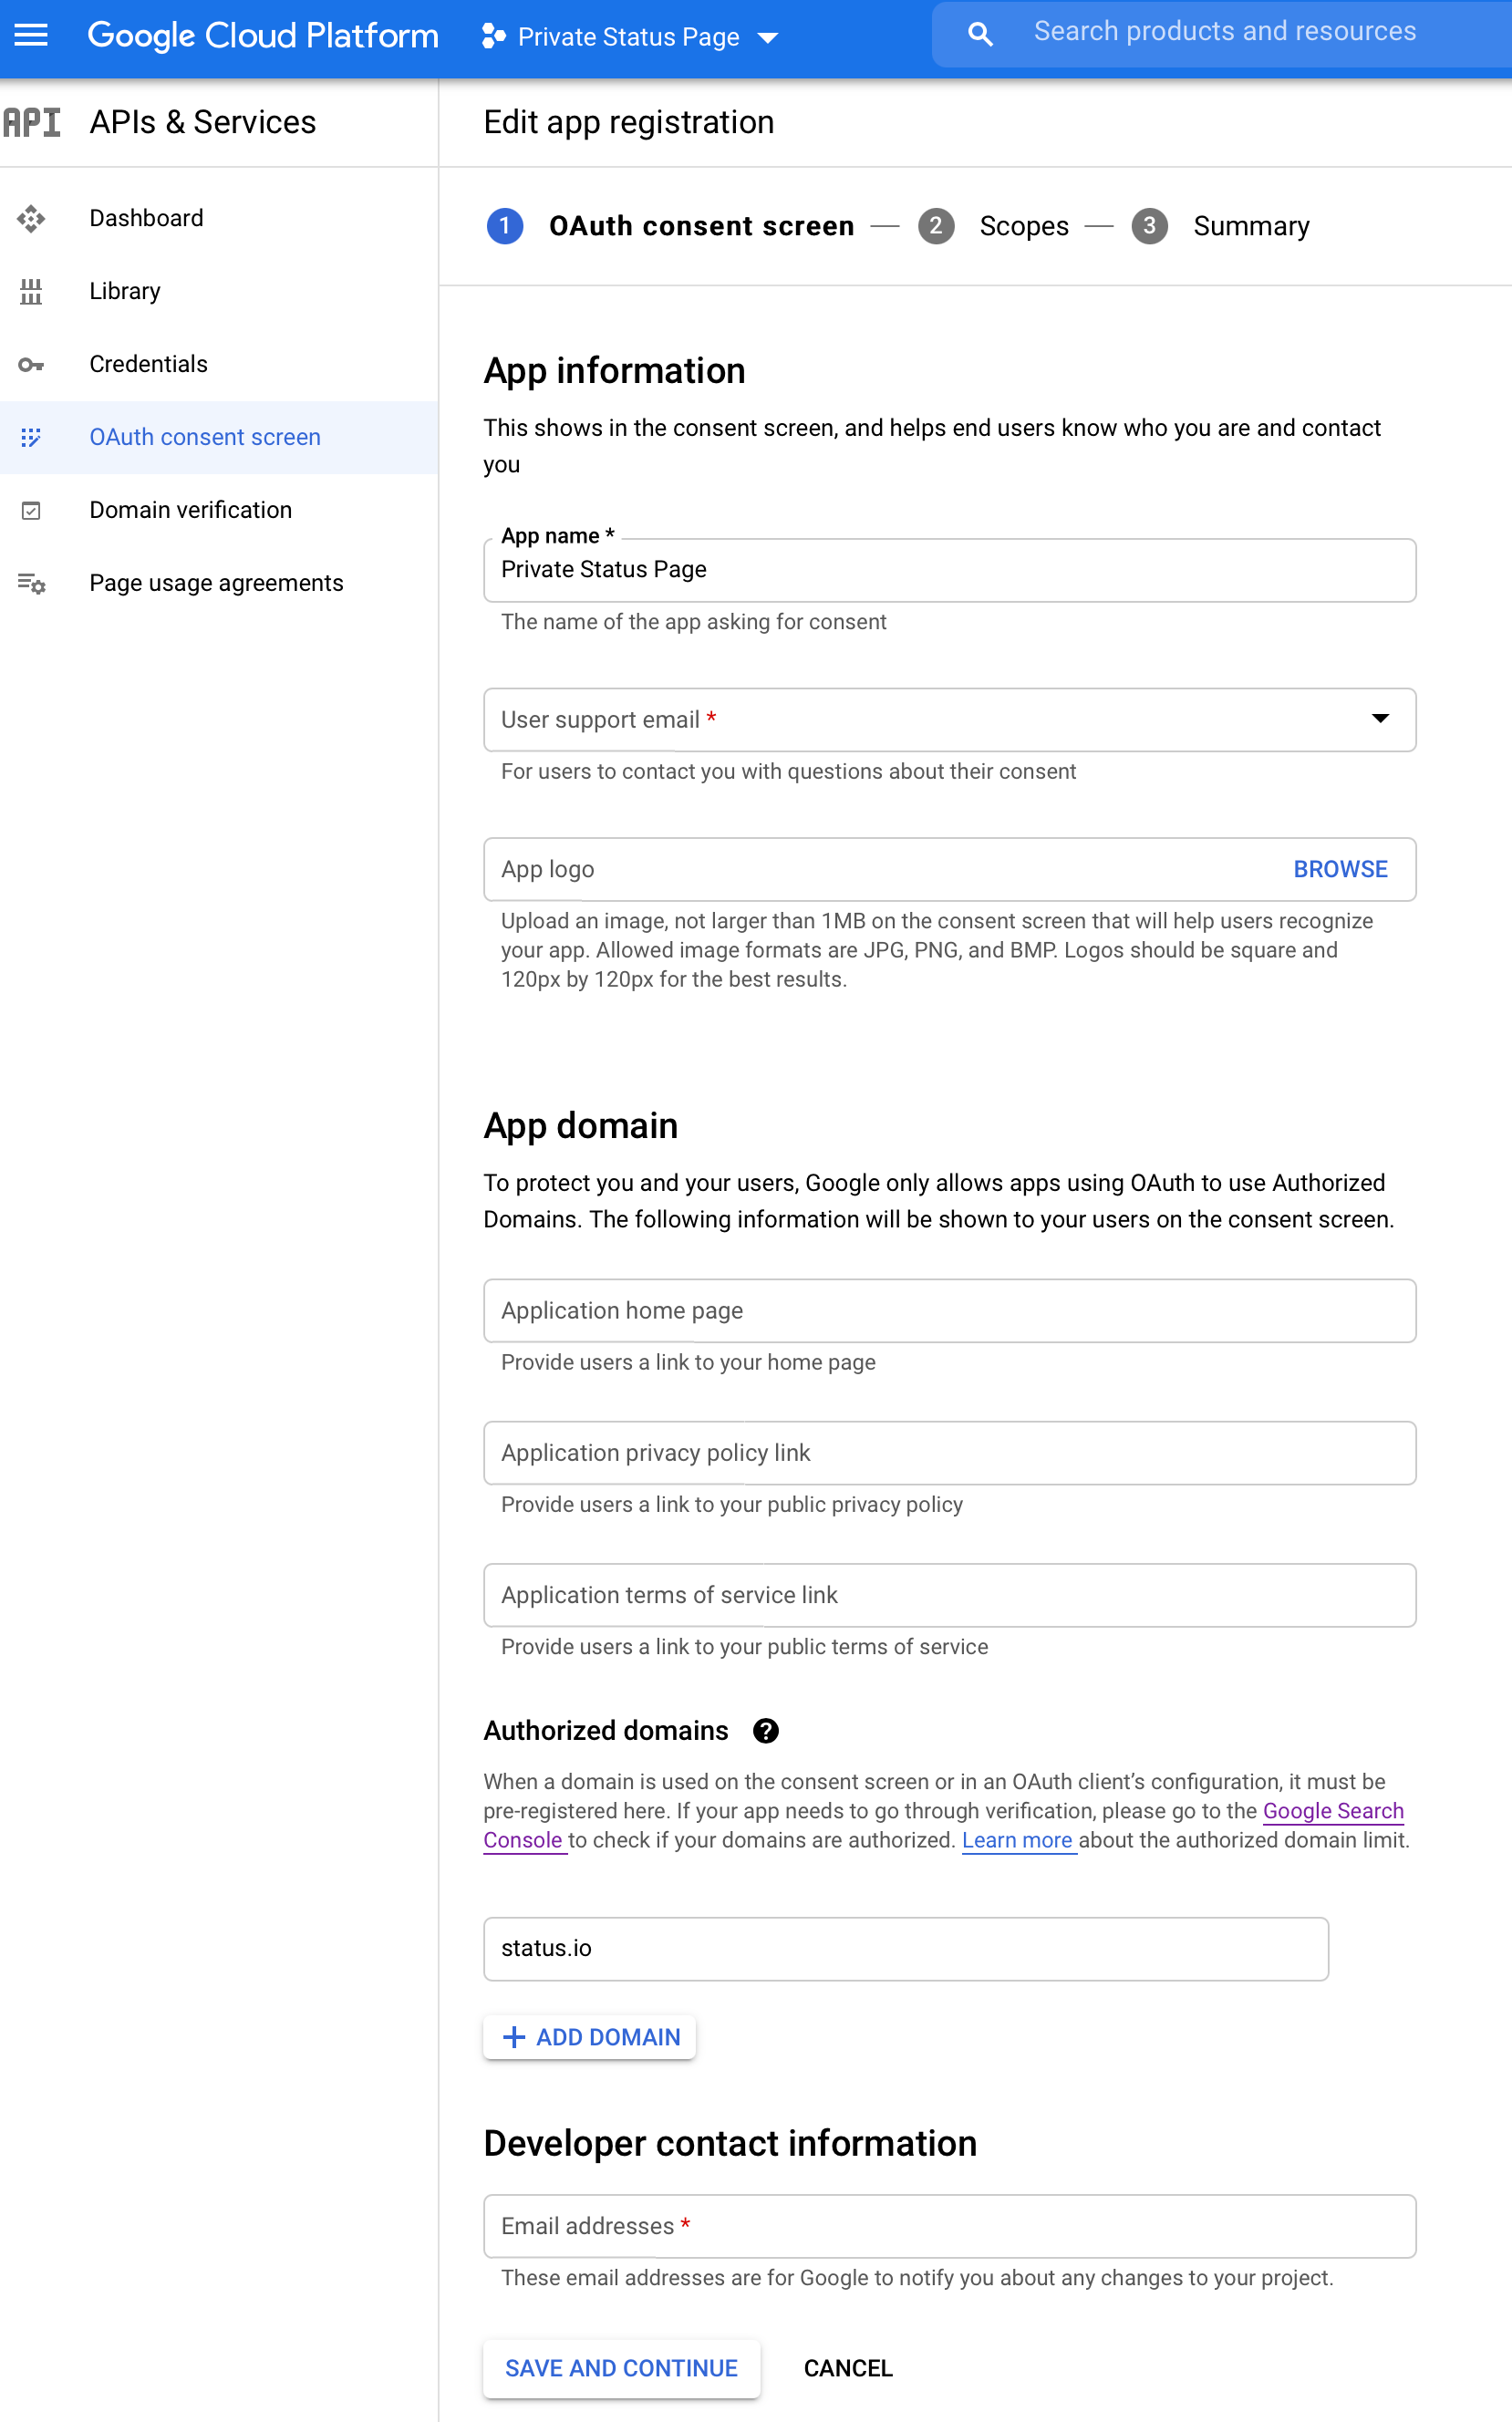
Step 3
Add your status page address to the list of Authorized domains
Add status.io to the list of Authorized domains
Click Create
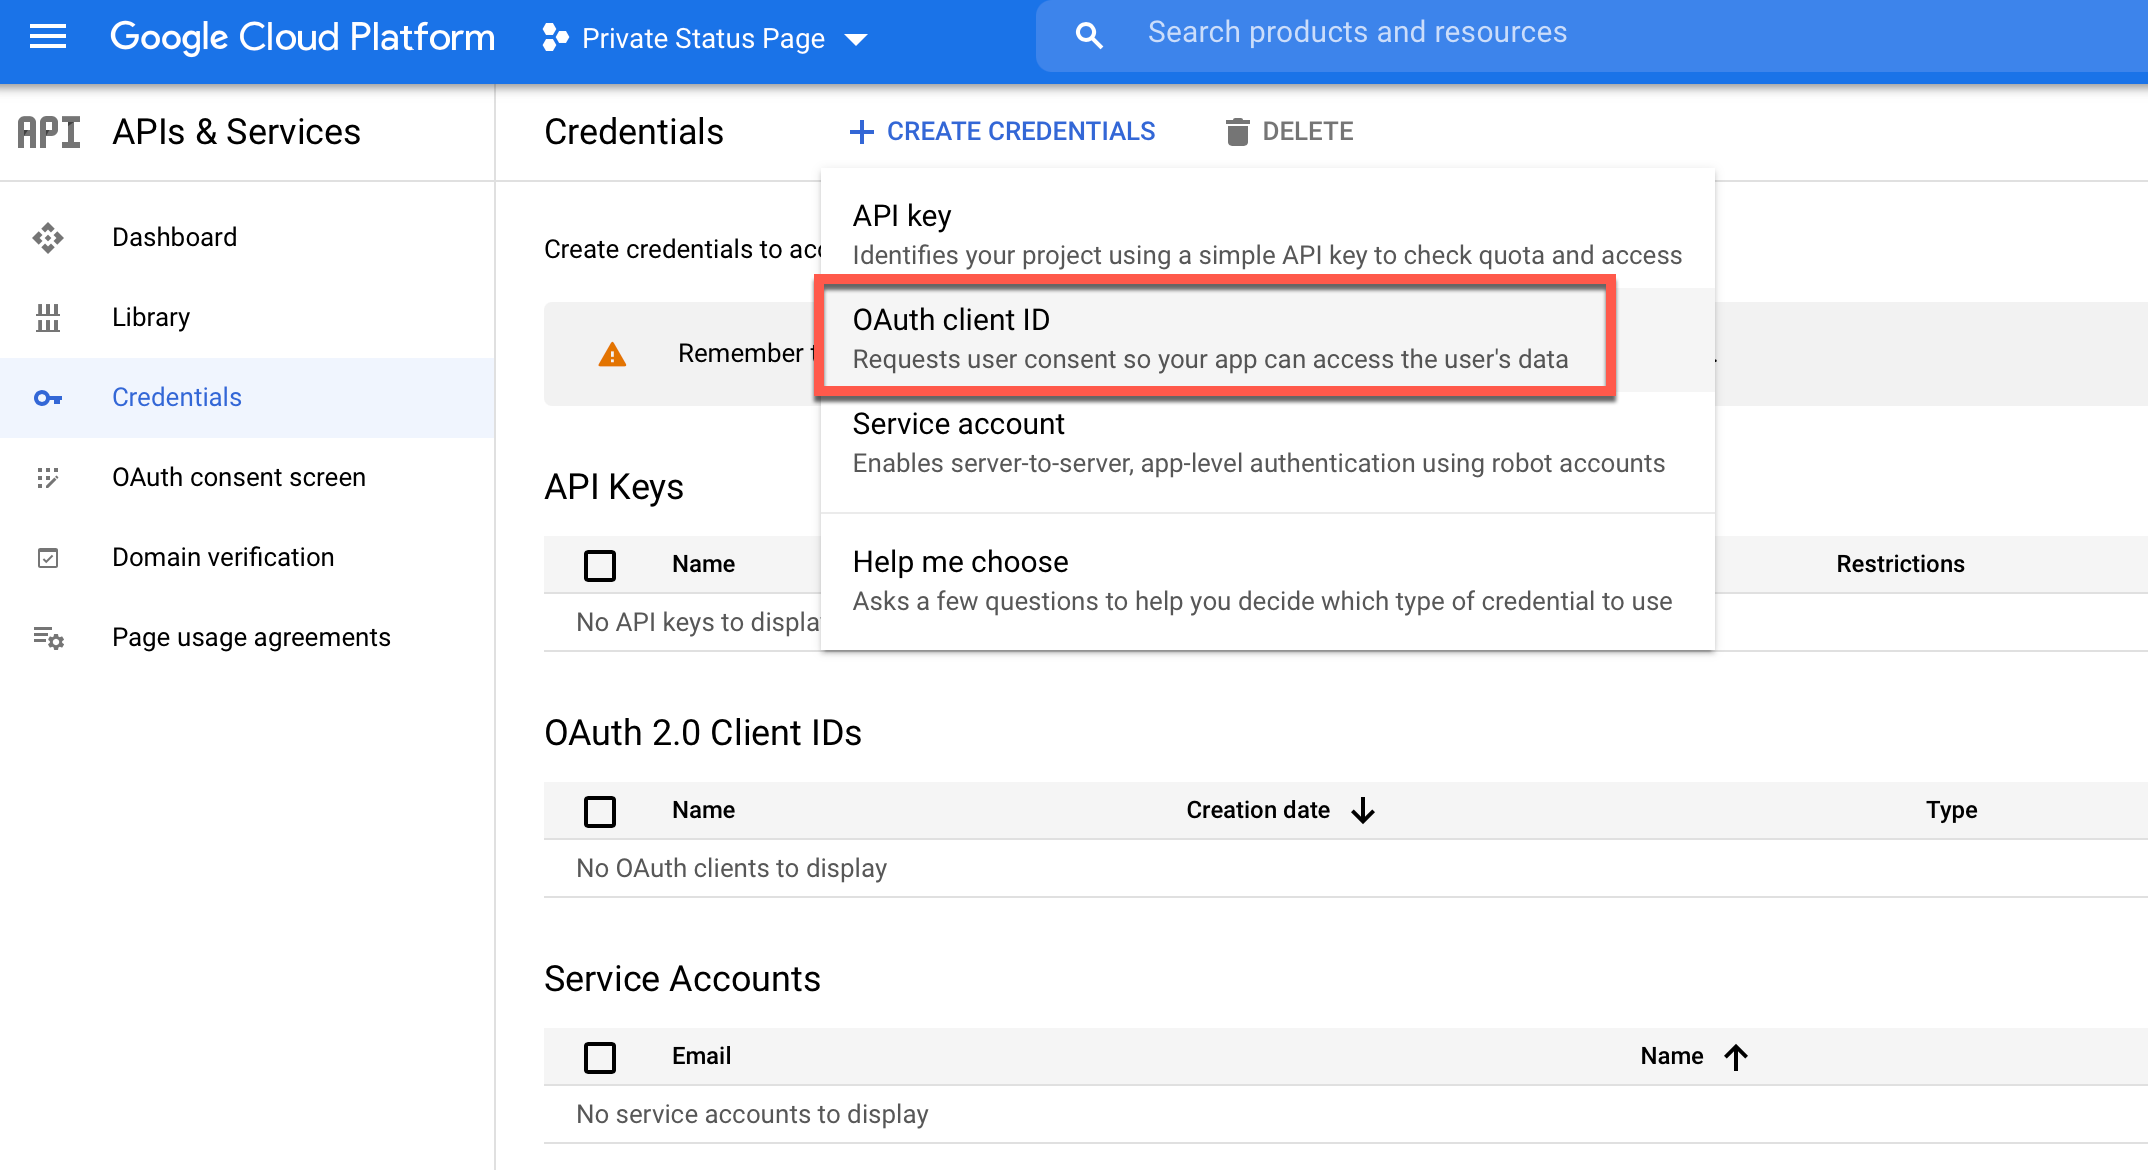
Step 4
Click the Credentials tab
Click Create Credentials and select OAuth client ID
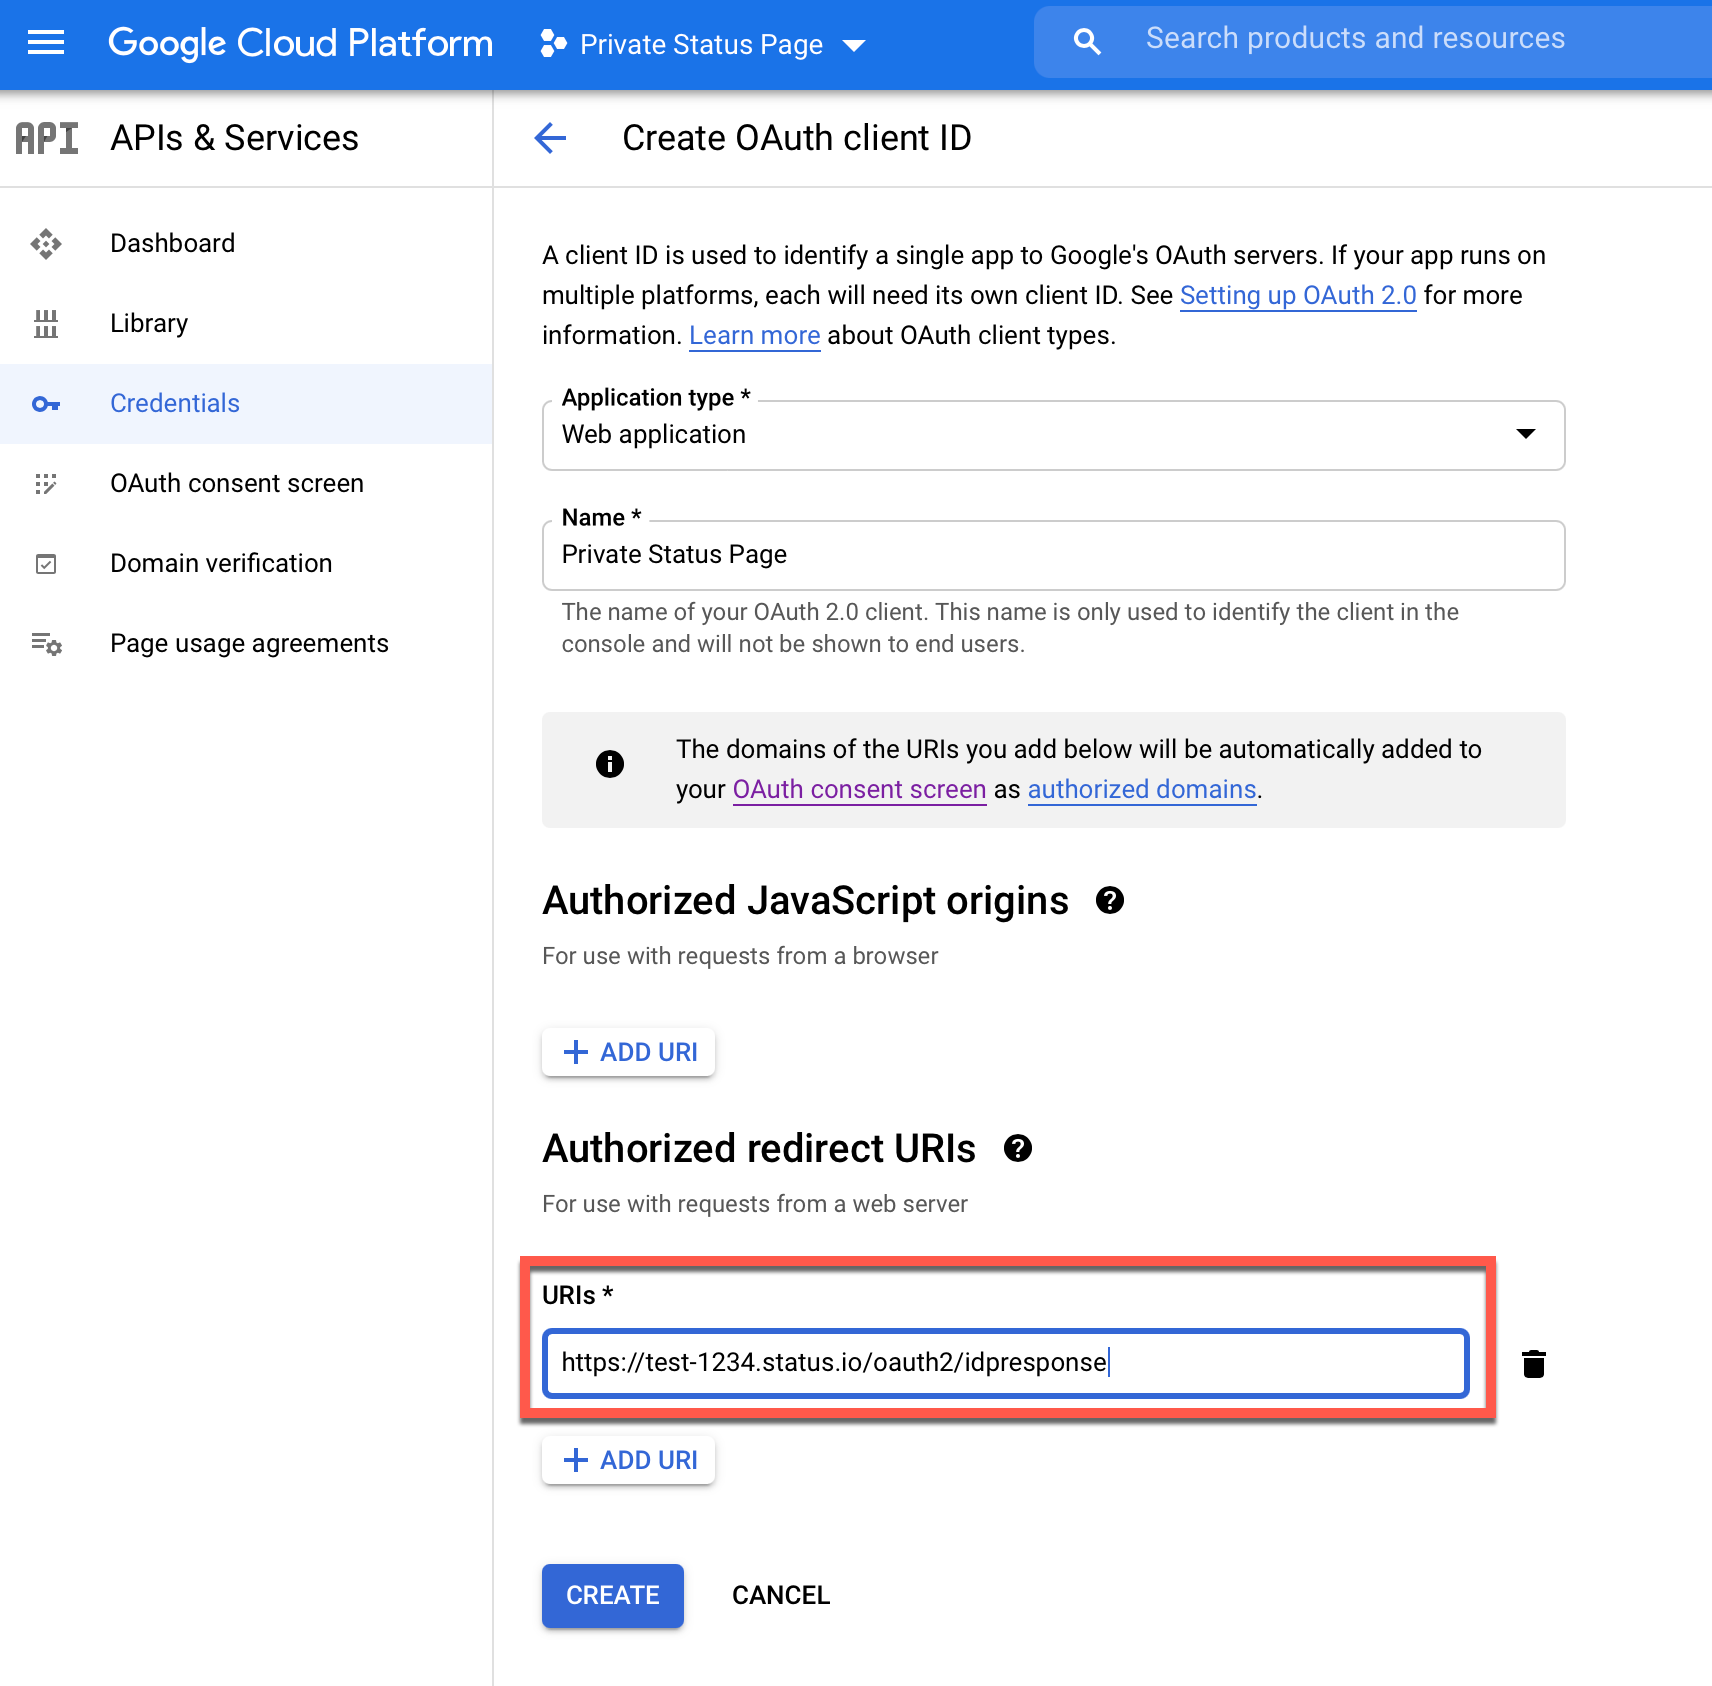
Step 5
Choose Web Application
Give it a descriptive name
Copy the Callback URL from the Status.io Dashboard to the Authorized redirect URIs field
Click Create
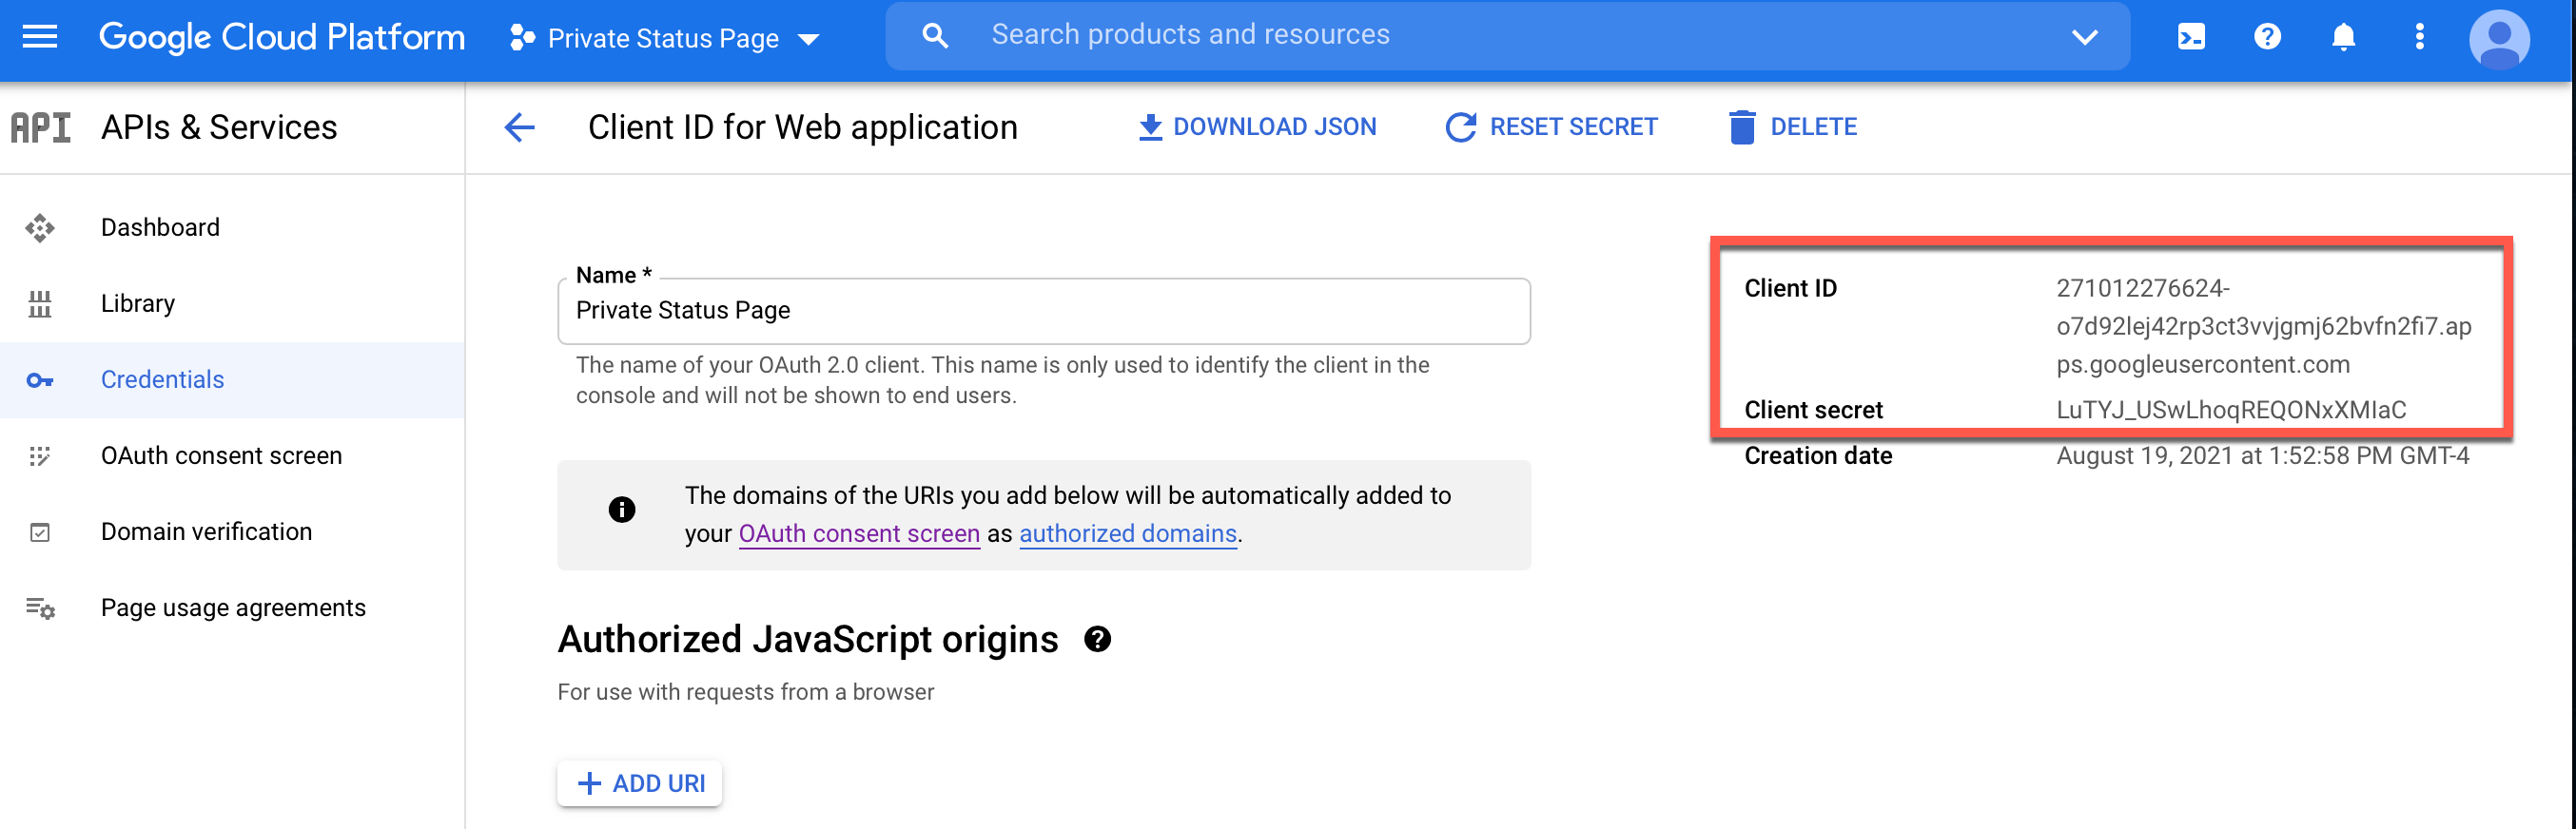
Step 6
Select the credentials you just created
Copy the Client ID and Client secret
Click Save
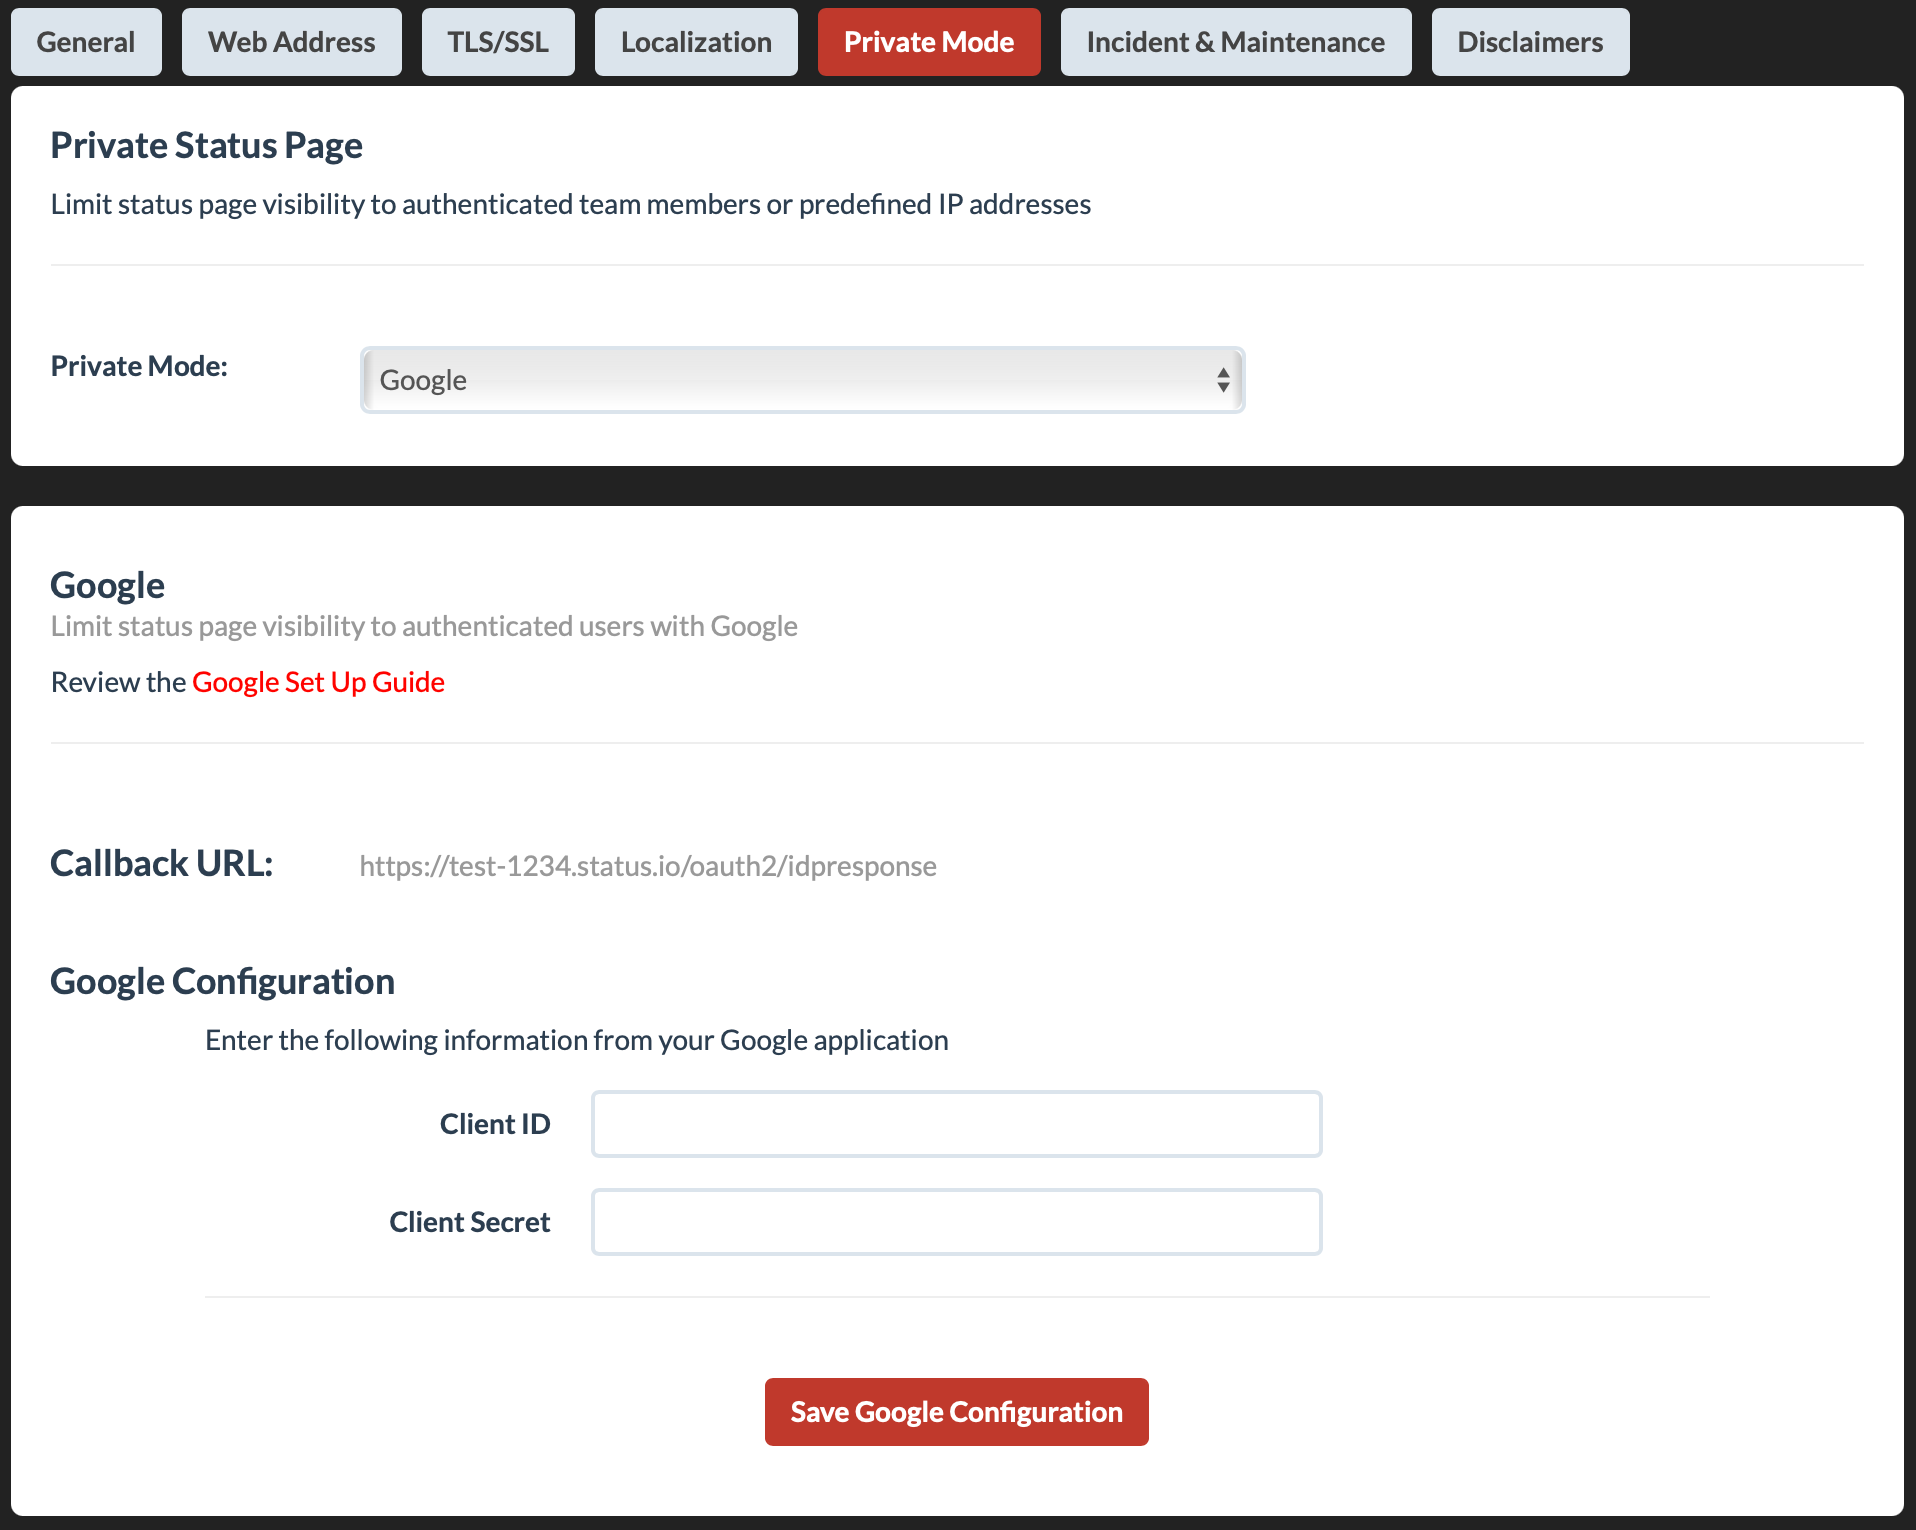
Step 7
Go to the Private Mode tab in your Status.io account
Enter the Client ID and Client Secret
Click the Save button
Update Client Secret
Rotate your client secret without disabling private mode or causing downtime.
Go to the Private Mode tab in your Status.io account and scroll down to the Update Client Secret section.

Troubleshooting
If you’re experiencing issues with your private status page, view Troubleshooting Private Pages for more information.