Follow this guide to set up Microsoft Azure single sign-on with Status.io for team member accounts.
Sign in to Azure and navigate to the Azure Active Directory Dashboard.
Select Enterprise Applications from the side menu.

Click the New application button.

Click Create your own application.
Give your application a name and click the Create button at the bottom.

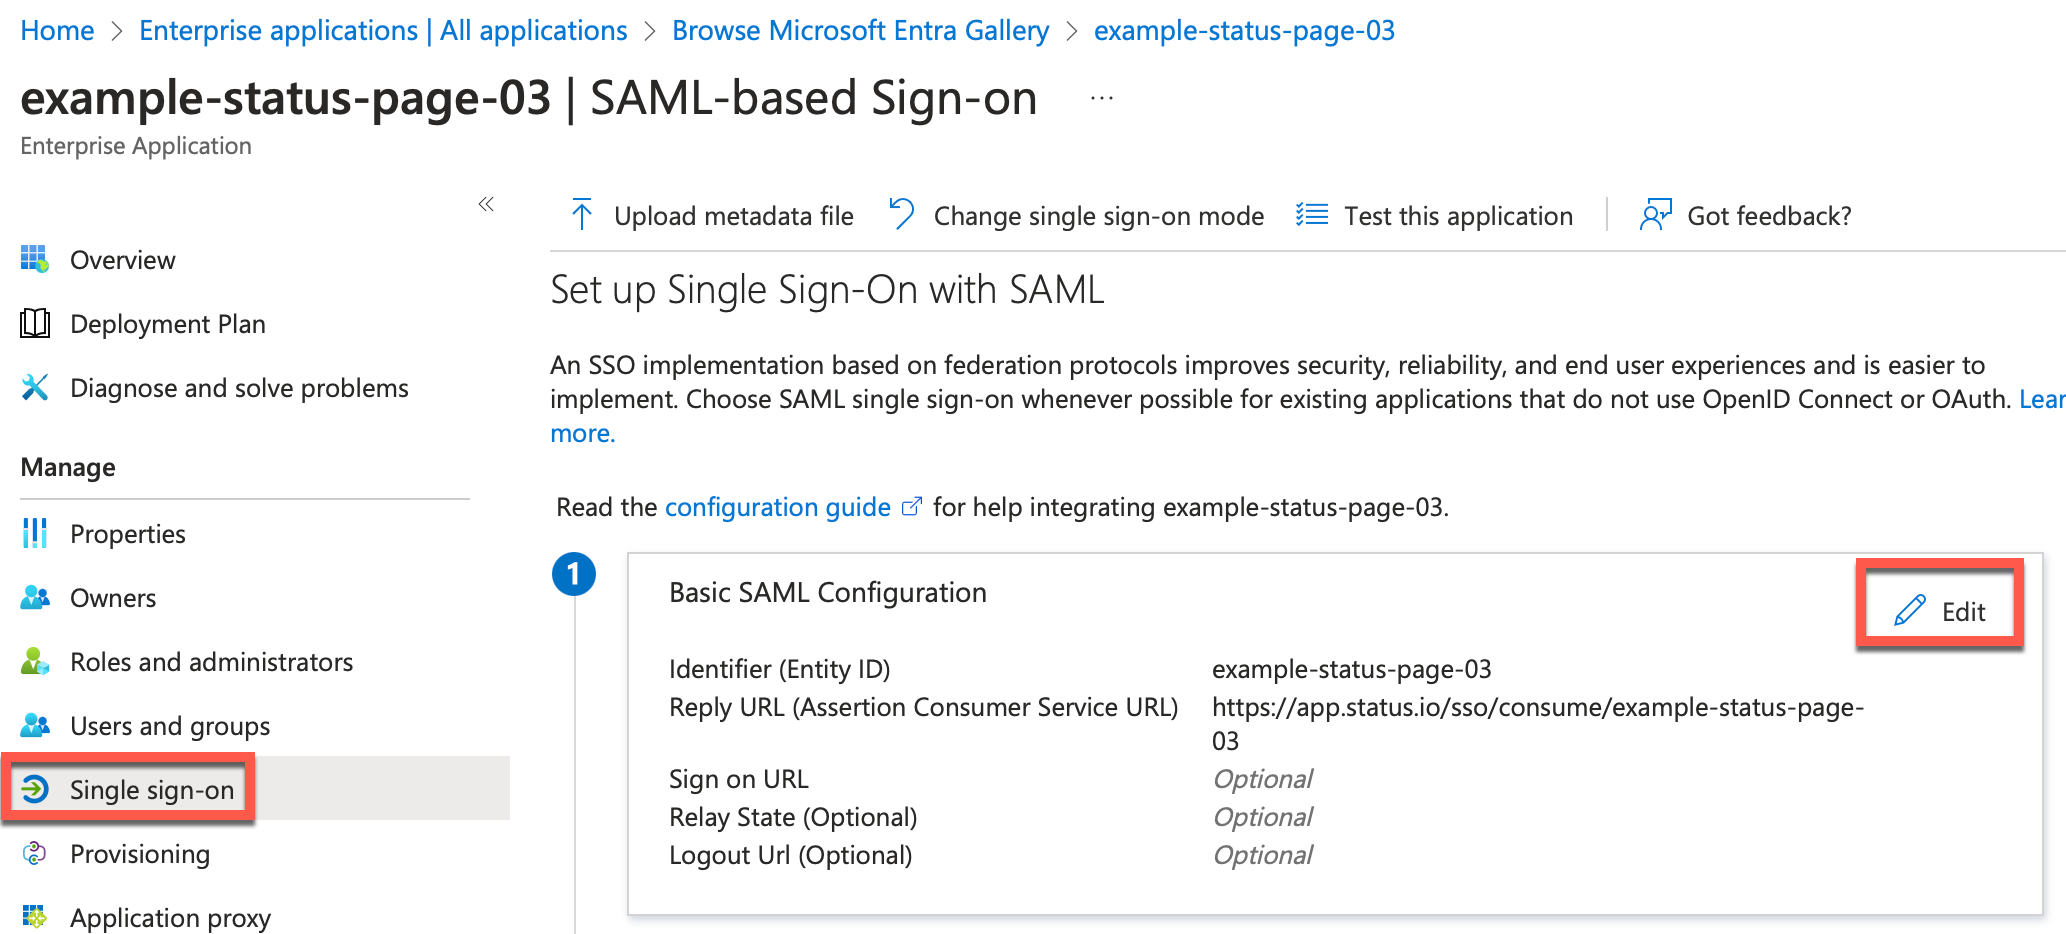
Once the application is created, click Single sign-on in the side menu and then SAML.

Click Edit next to Basic SAML Configuration.

Add an Identifier (Entity ID).
Add the Reply URL using the example below and click Save. Don’t worry about the URL being correct since we will change it in the next steps.

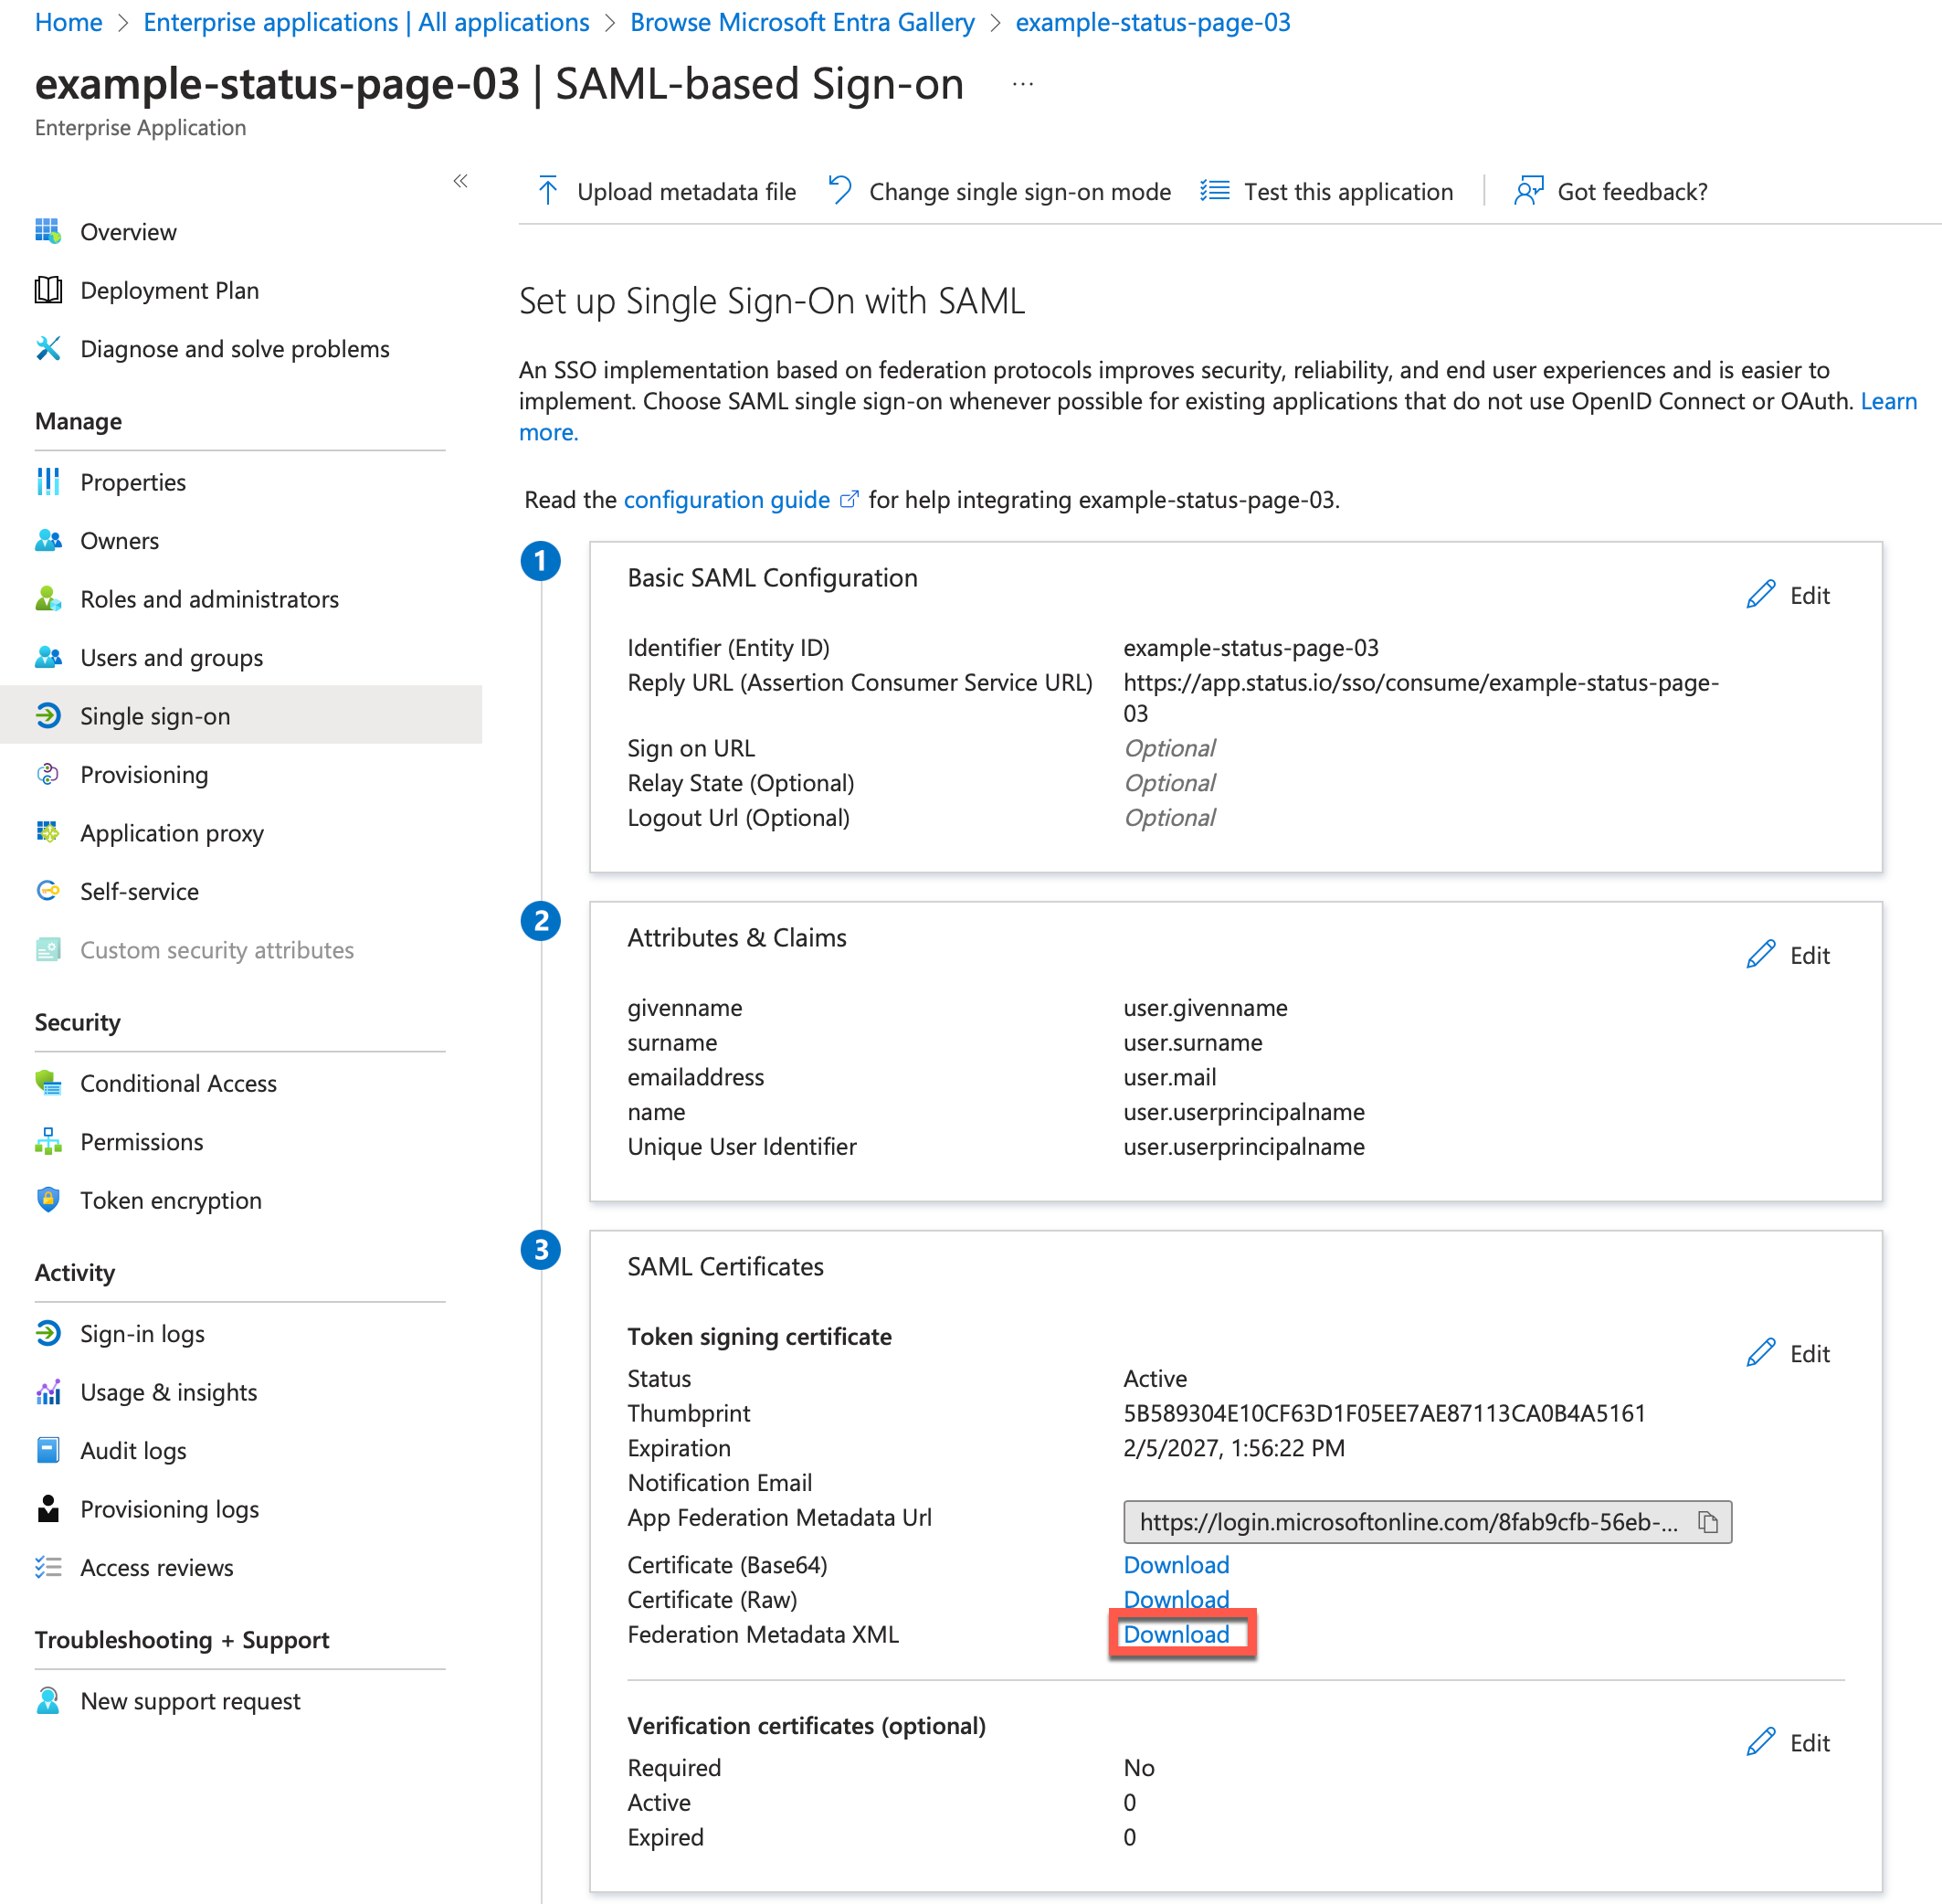
Download the Federation Metadata XML.

Within your Status.io account, navigate to Team settings and click the SSO Configuration button.
Choose a unique Organization ID. This ID will be used by your team members to sign in.
Open the Federation Metadata XML file (downloaded from Azure) in a text editor and copy the contents.
Paste the XML into the Metadata field and click the Save SSO Configuration button.

Click the SSO Details button and copy the Callback URL.

Return to Azure and click Single sign-on in the side menu. Then click Edit next to Basic SAML Configuration.

Change the Reply URL to match the Callback URL from Status.io and click Save.

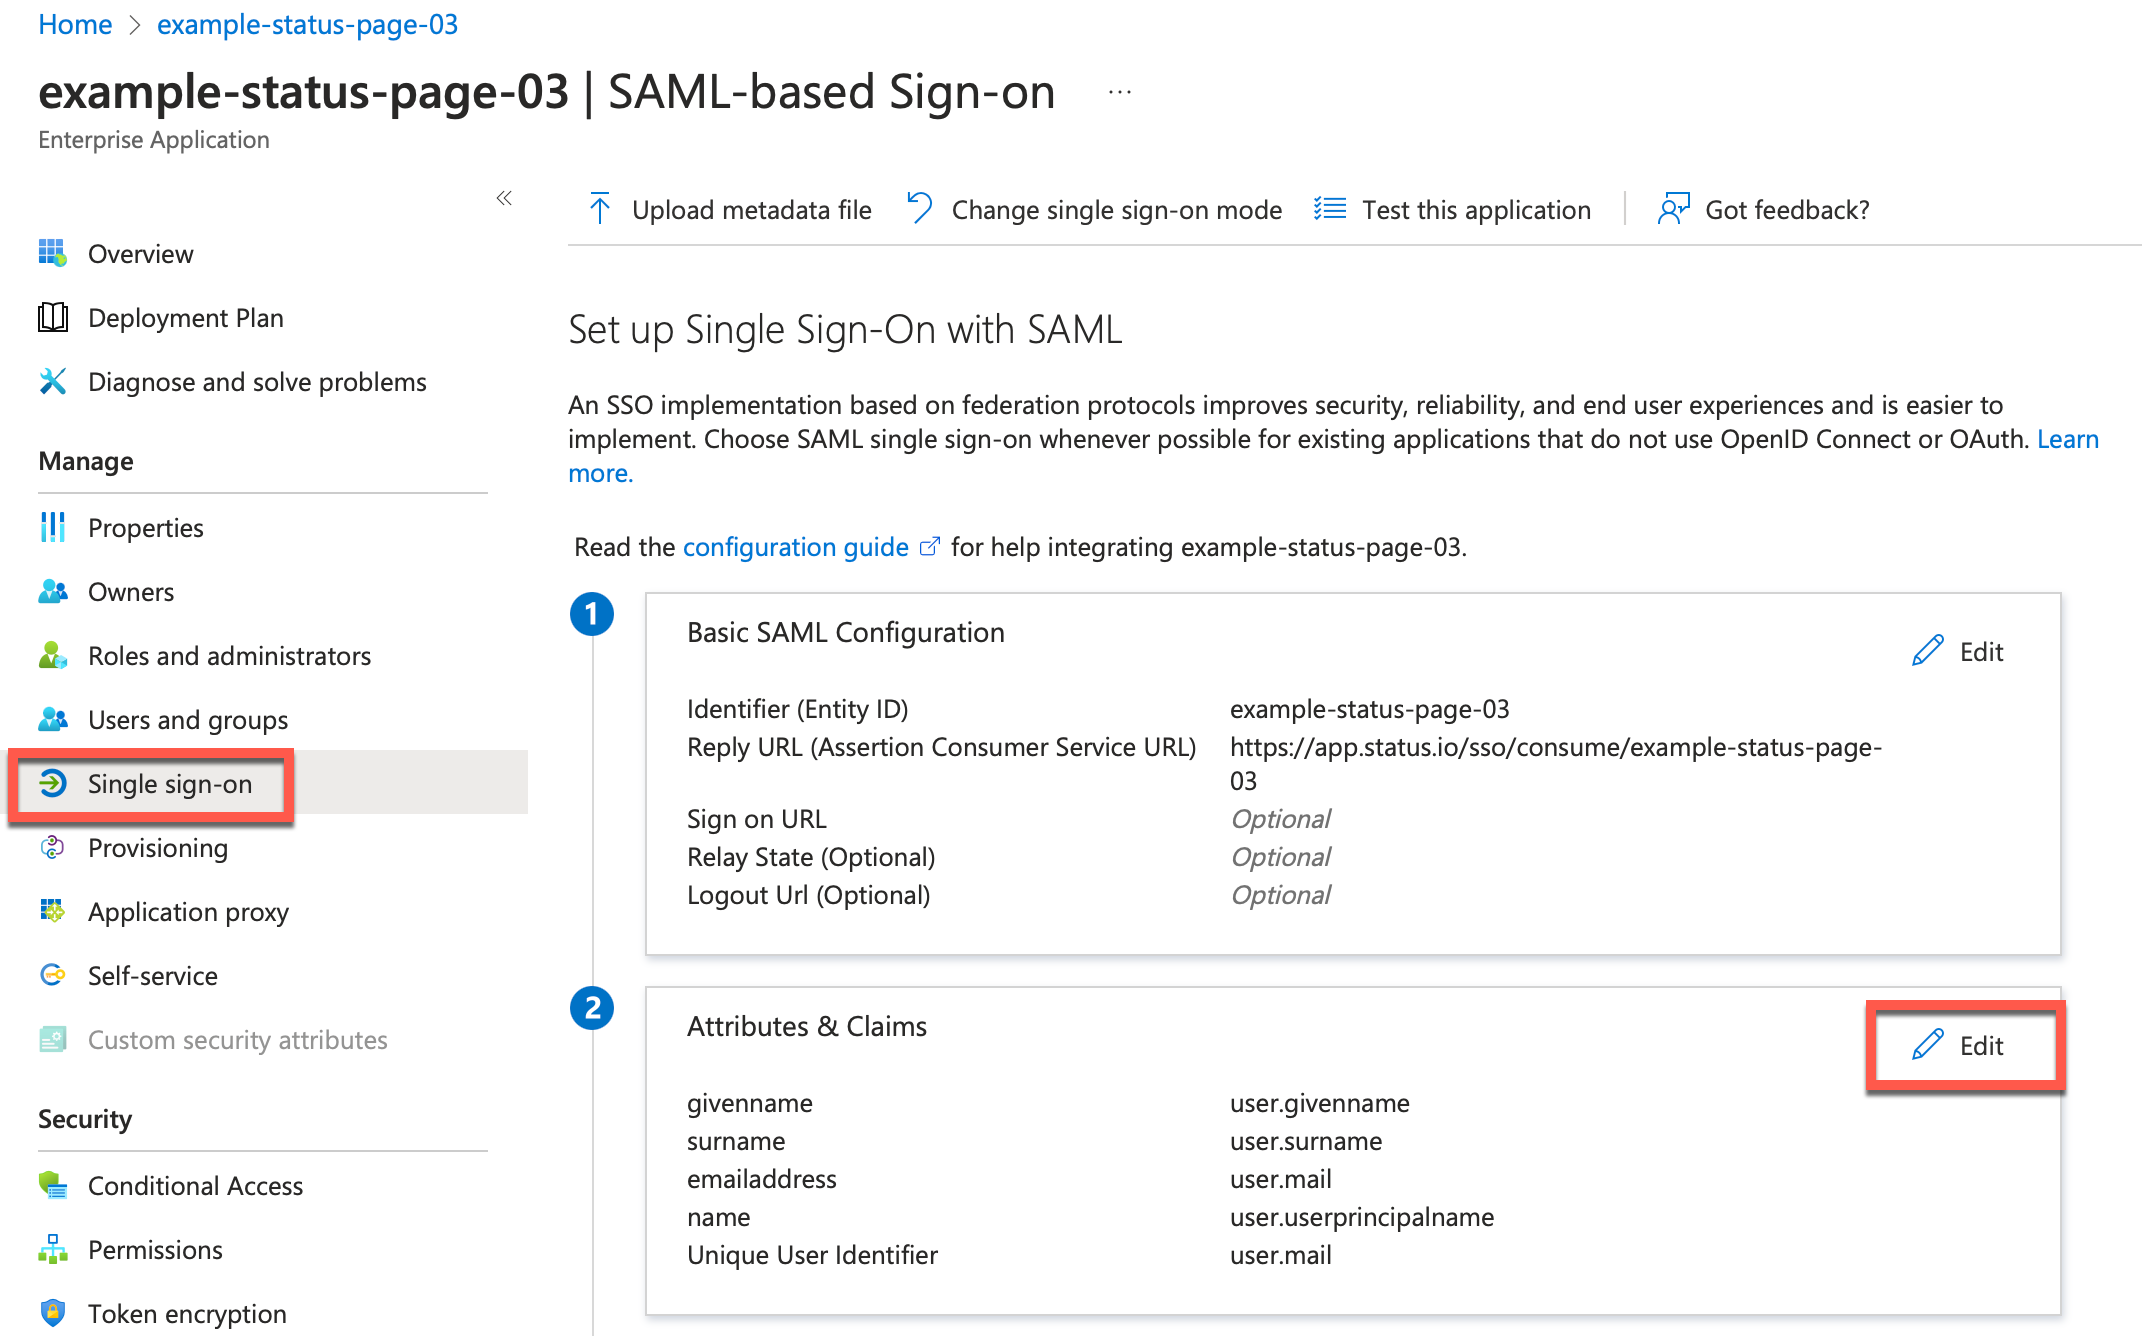
Click Edit next to Attributes & Claims.

Then click on Unique User Identifier (Name ID) below Required claims.

Click the dropdown selector next to Source attribute and select user.mail. Click Save.

Select Users and groups from the side menu and proceed to add the groups and/or users that you wish to grant access to your team at Status.io.

SSO is now set up and ready for your team. They can sign in to Status.io using either the Sign in URL or the Organization ID.
Learn more about SSO with Status.io in the SSO Frequently Asked Questions.
